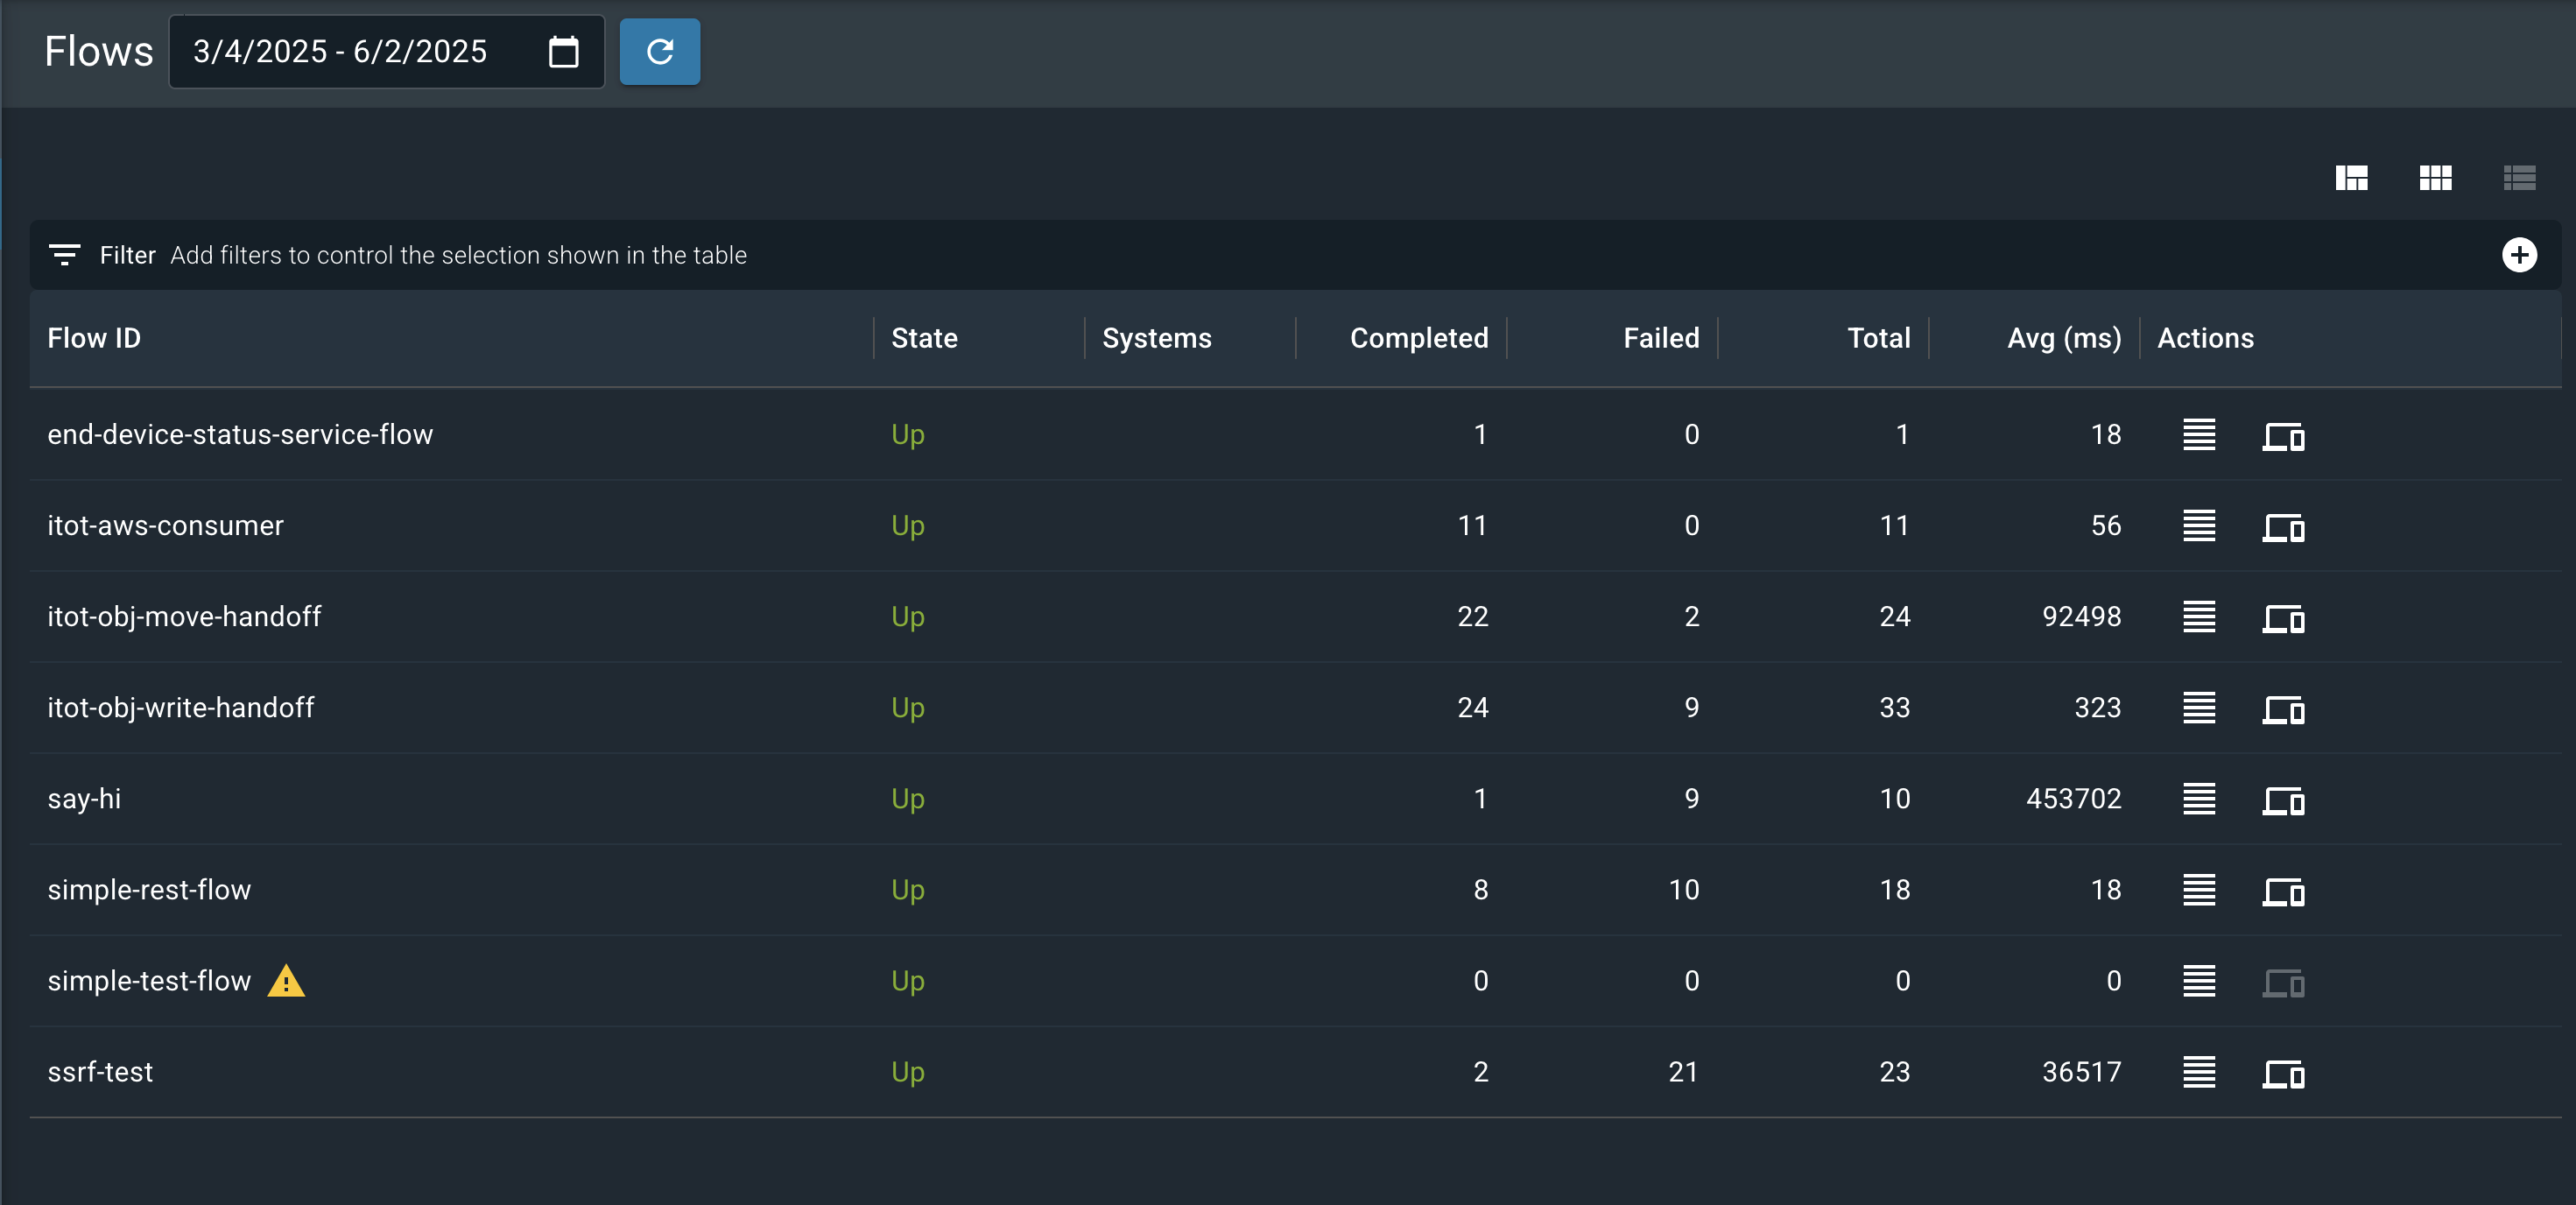
Flows
The Flows page lists every flow deployed for your organization.
Navigate to the Heartbeat Console and select Flows from the left-navigation menu.
Headless flows
To view headless flows, select Show Headless Flows.
The headless flows are then added to the list, as shown in the following image:
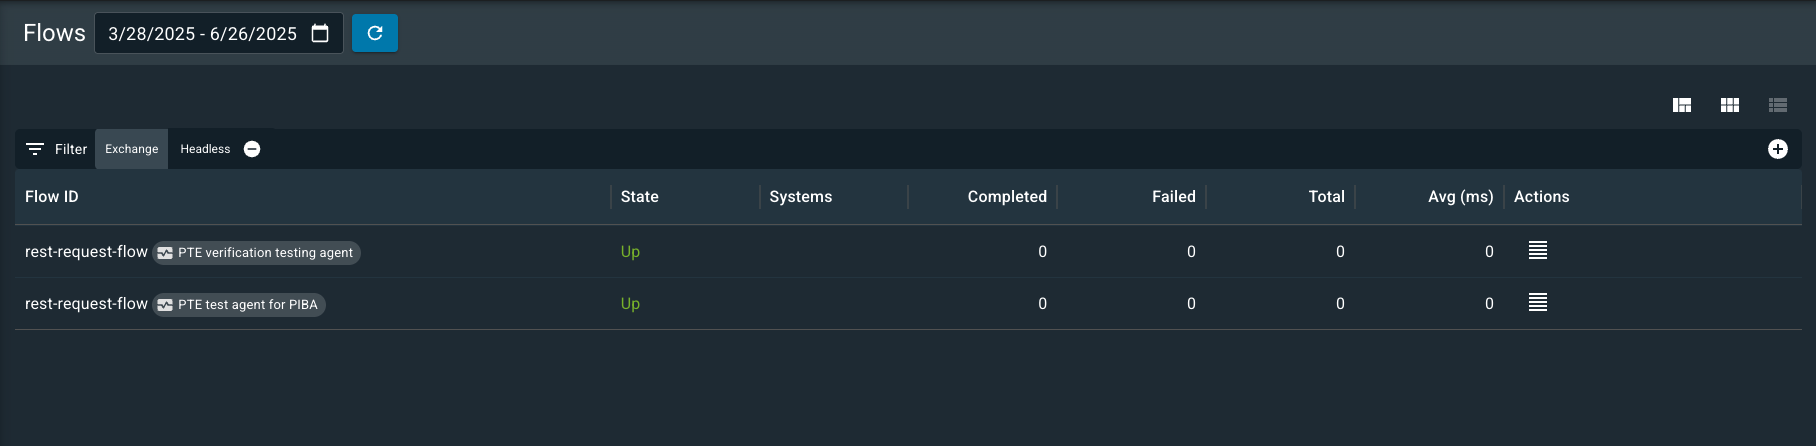
| Headless flows are always part of a larger message processing pipeline, and they do not have separate message processing metrics. By default, they do not appear in the main list, but they are visible as "downstream flows" on the details pages of the flows that use them. |
Groups
The flow groups are displayed in the Groups column in the flows table. By default, the groups column is not visible, but it can be viewed by selecting the overflow menu in the top right corner of the flows list and selecting Manage columns and choose Groups.
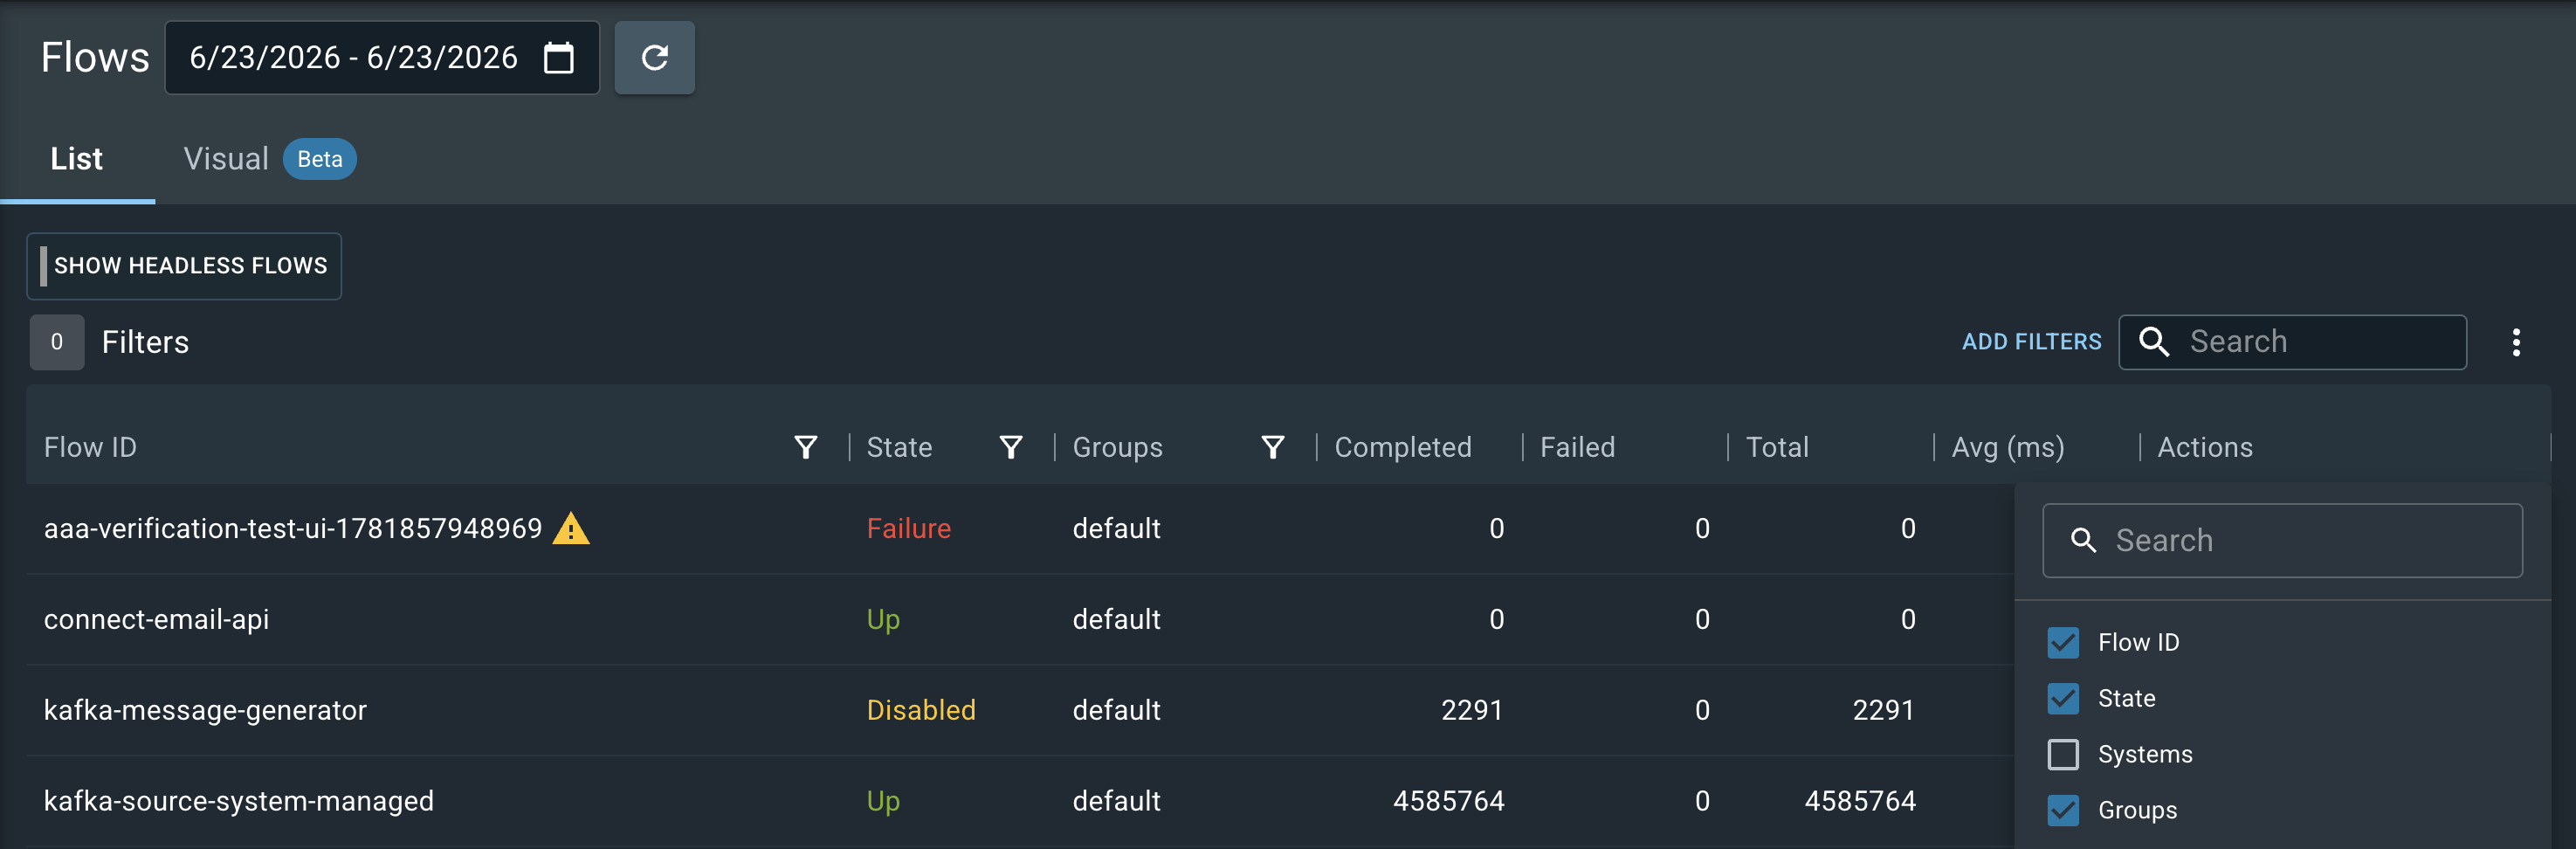
Flows without an assigned group are listed under "default". Flows deployed from a Beatbox installation are grouped by the name provided when creating the Beatbox ID.
| Beatbox flows appear on this page only if you create an Beatbox user and include its credentials in the beatbox.env file. |
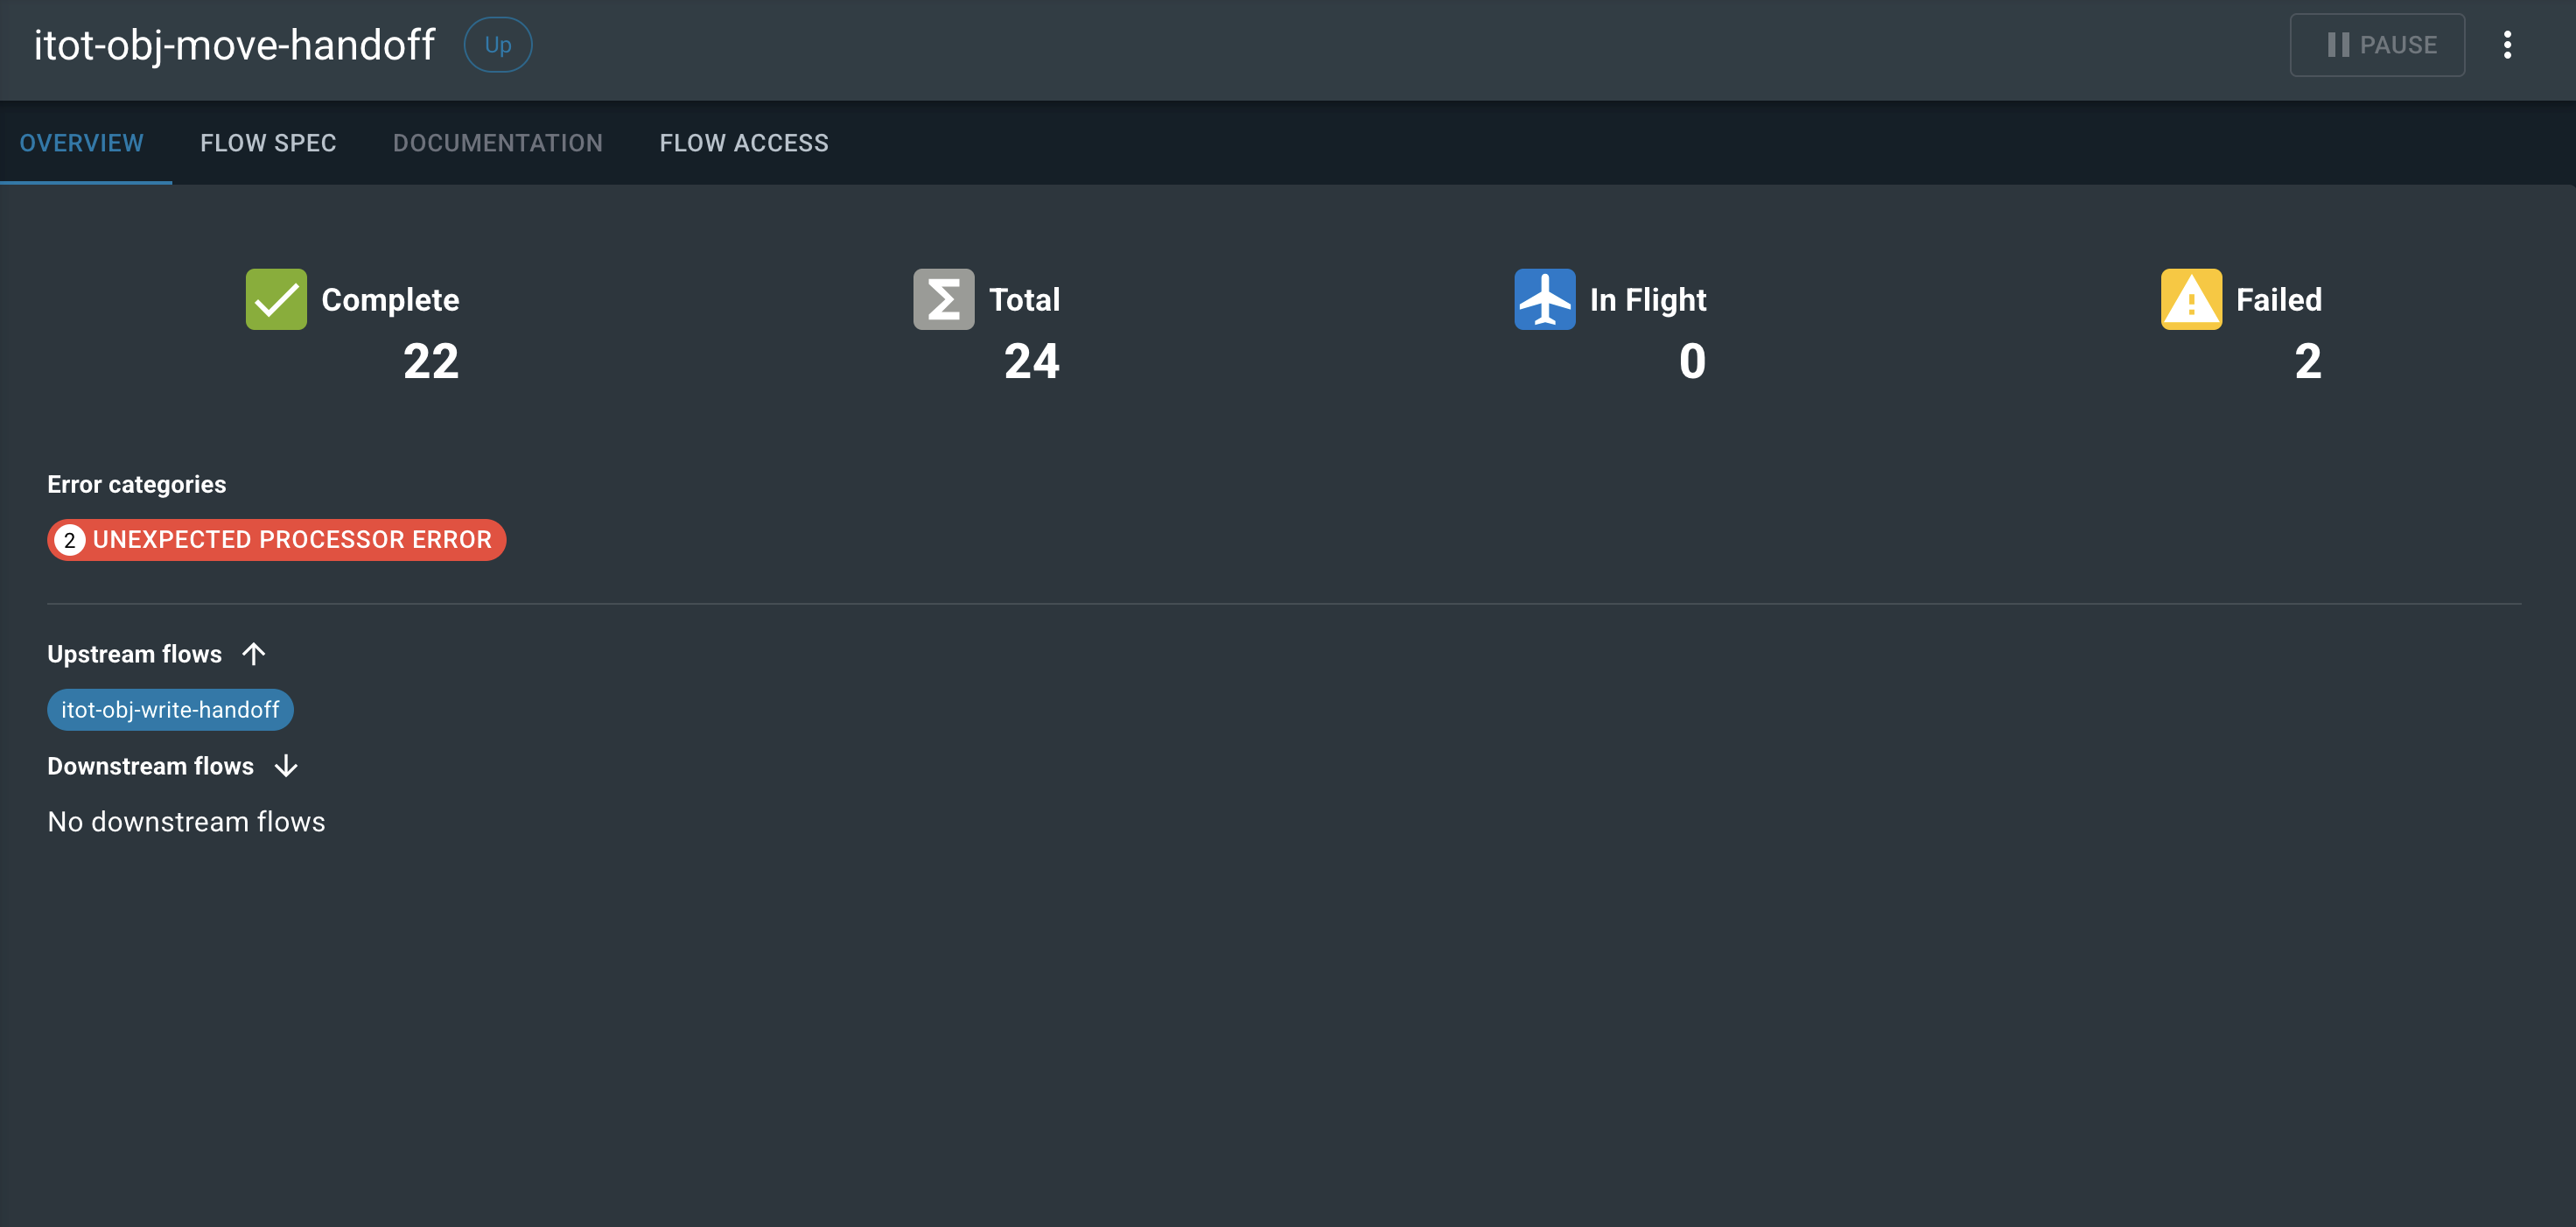
Flow Details
Select a flow from the list to open its details page. The details page shows the flow’s current status, configuration, and flow access across multiple tabs.
Disable Flows
You can temporarily disable a flow while investigating issues or performing maintenance.
To disable a flow with a REST, SOAP, or handoff source, open the flow page and select Disable in the top-right corner. Provide a reason for disabling the flow. Other users can see this reason. The following image shows a disabled flow:

When a flow is disabled, REST API endpoints return a 503 status with the following payload:
{
  "message": "Request rejected because the endpoint has been disabled."
}
To resume the flow and remove the warning, select Enable in the top-right corner.
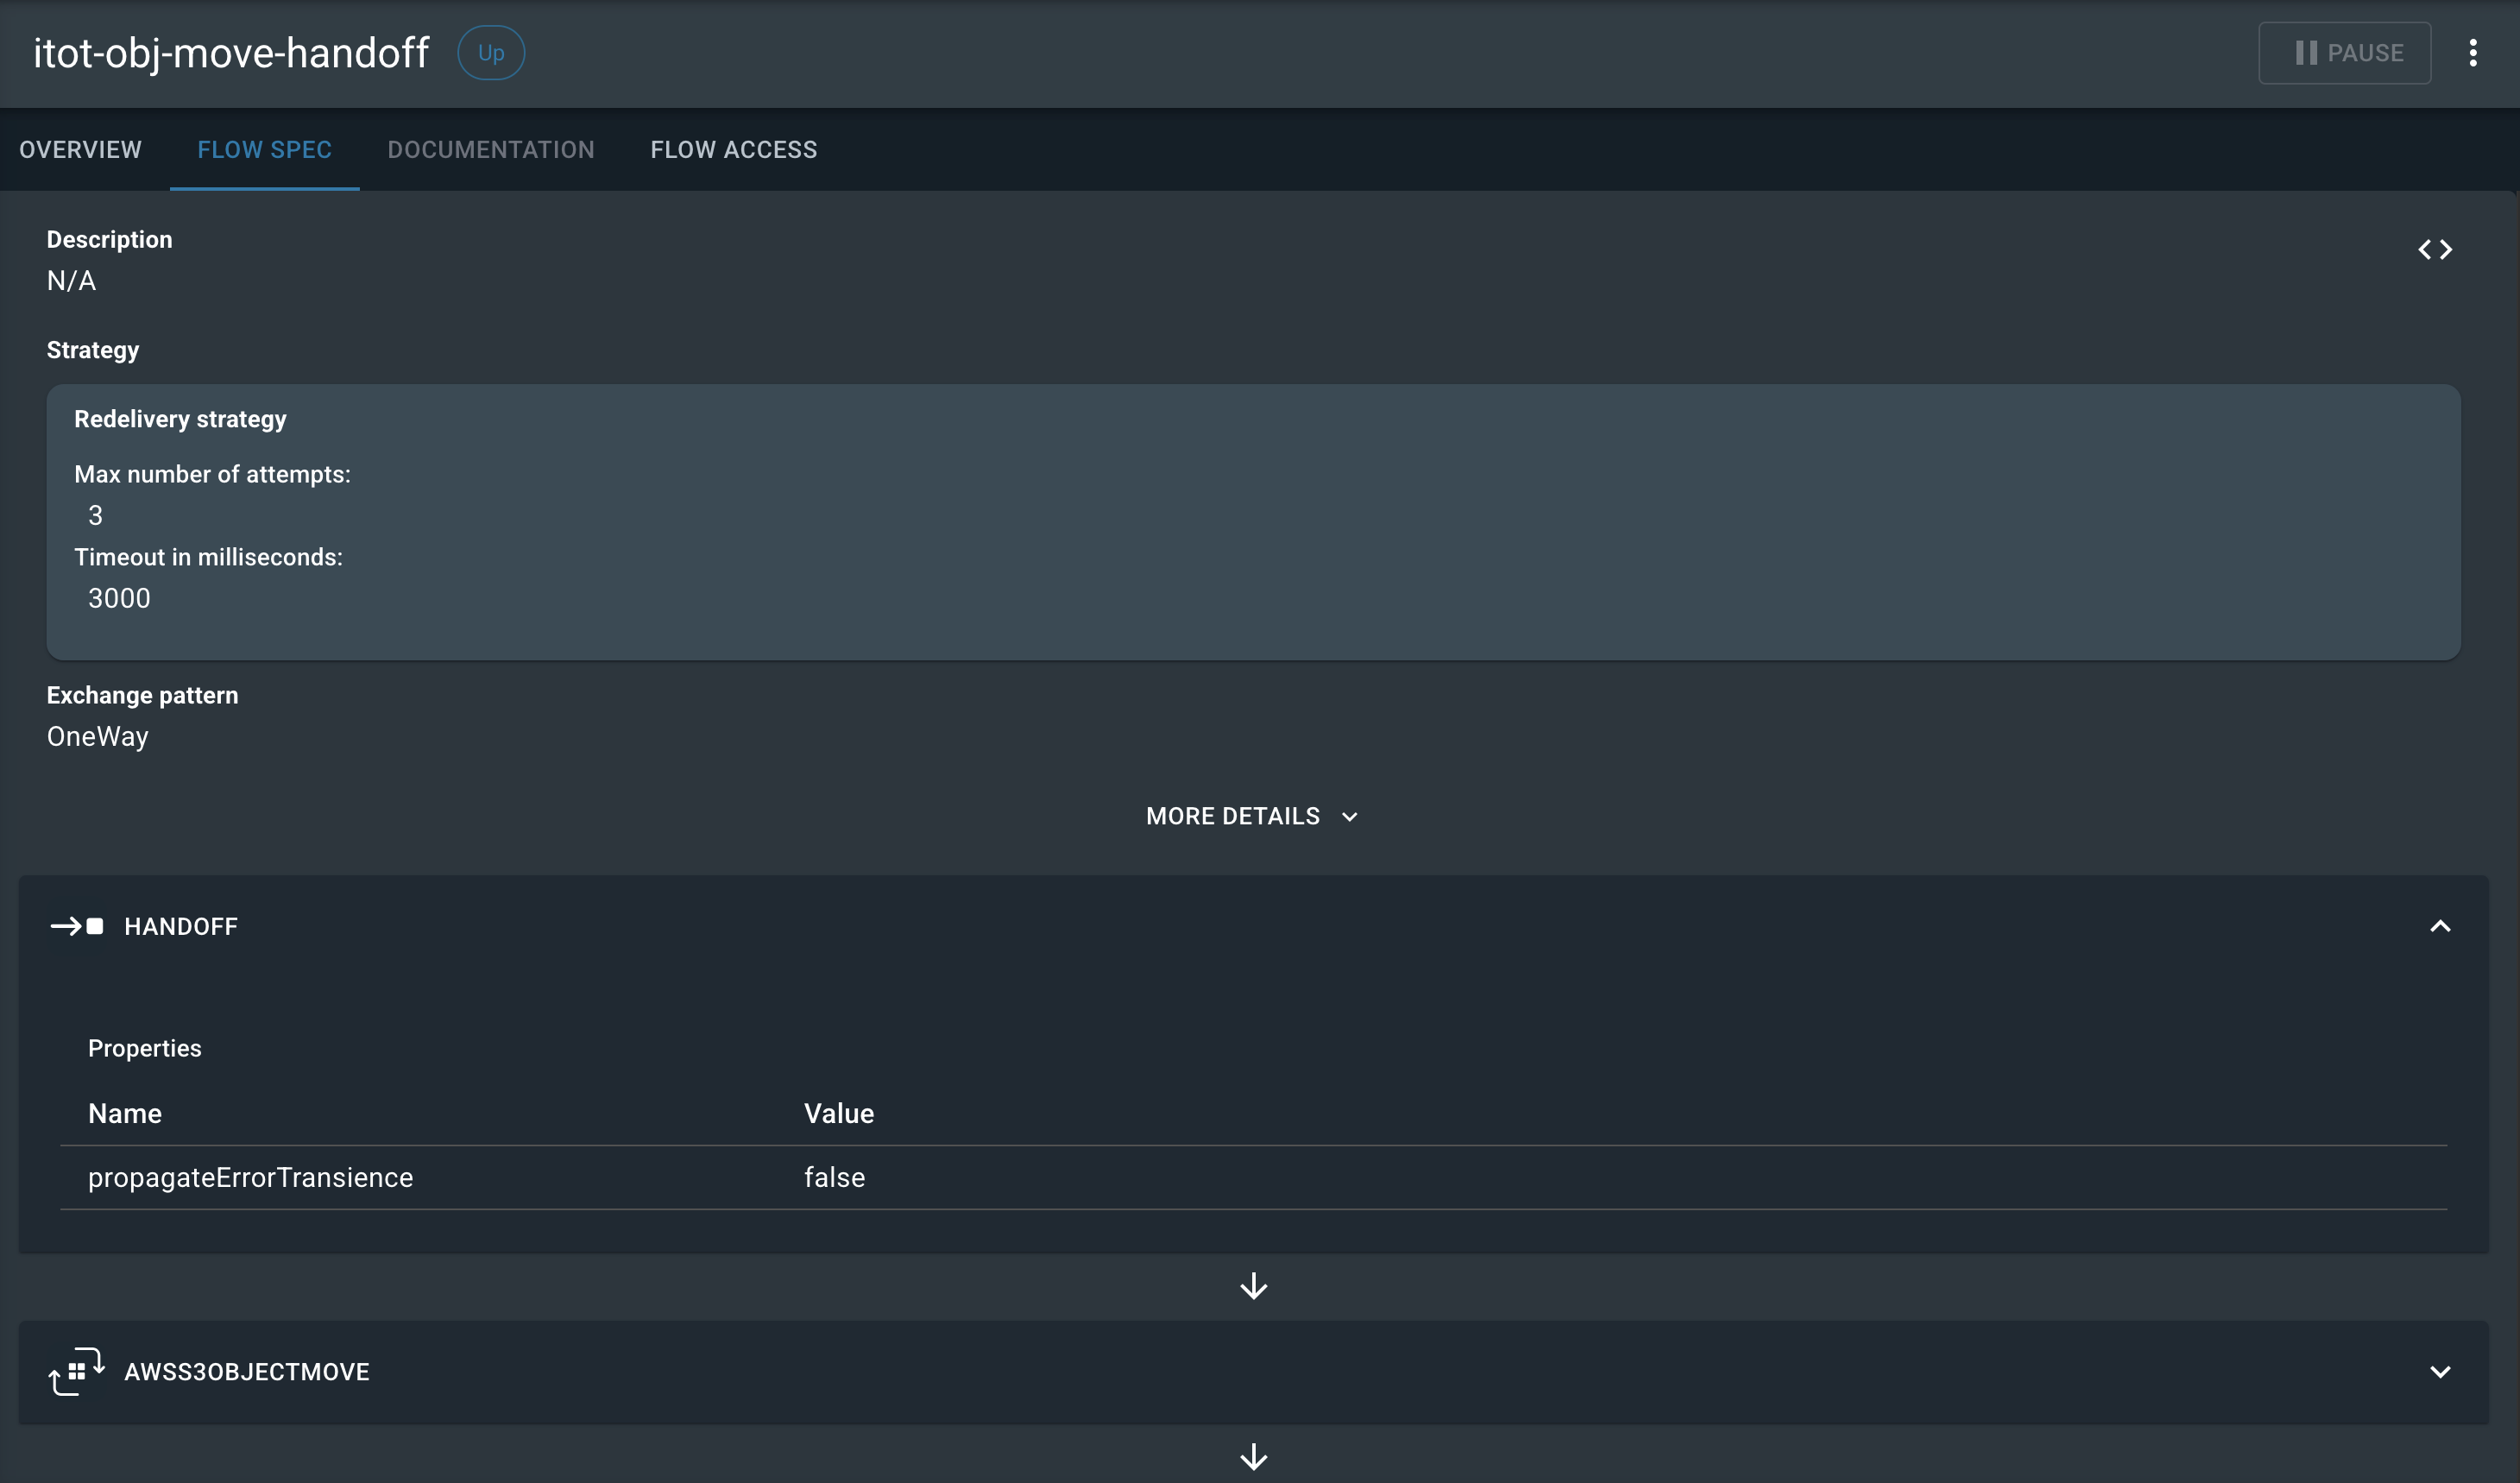
Flow Spec
Select the Flow Spec tab to review a flow’s specification. Use the button on the right side of the page to change the view:
| Button | Description |
|---|---|
|
A visual low-code view of the flow specification with sections that you can expand and collapse. |
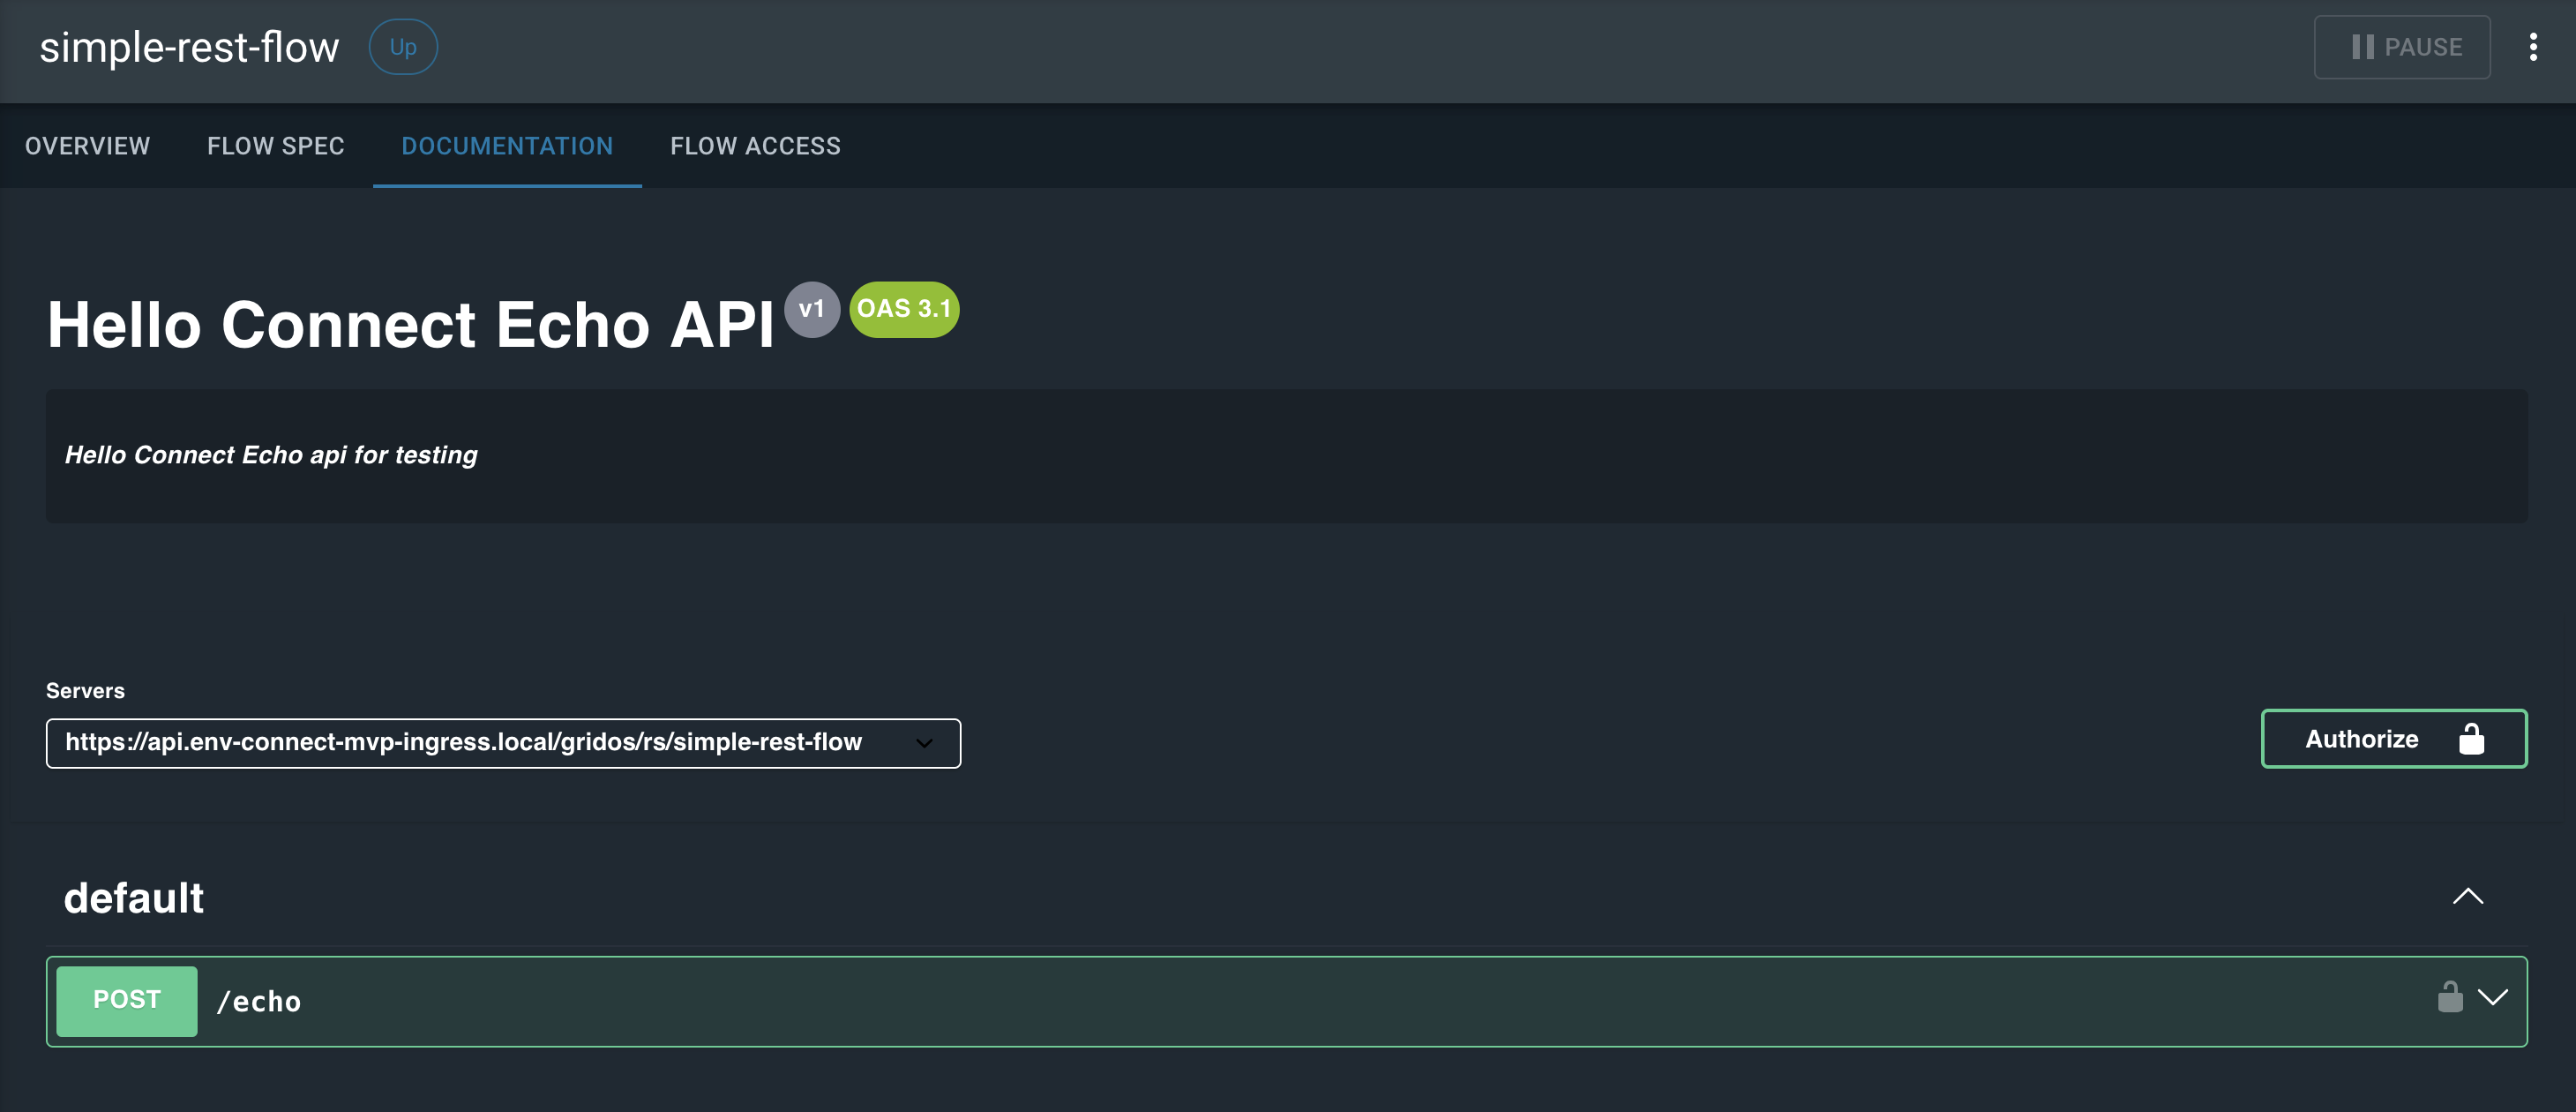
Documentation
If the flow exposes a REST API, its OpenAPI resource is converted into a testable UI and the Documentation tab appears. The following image shows what this tab looks like:
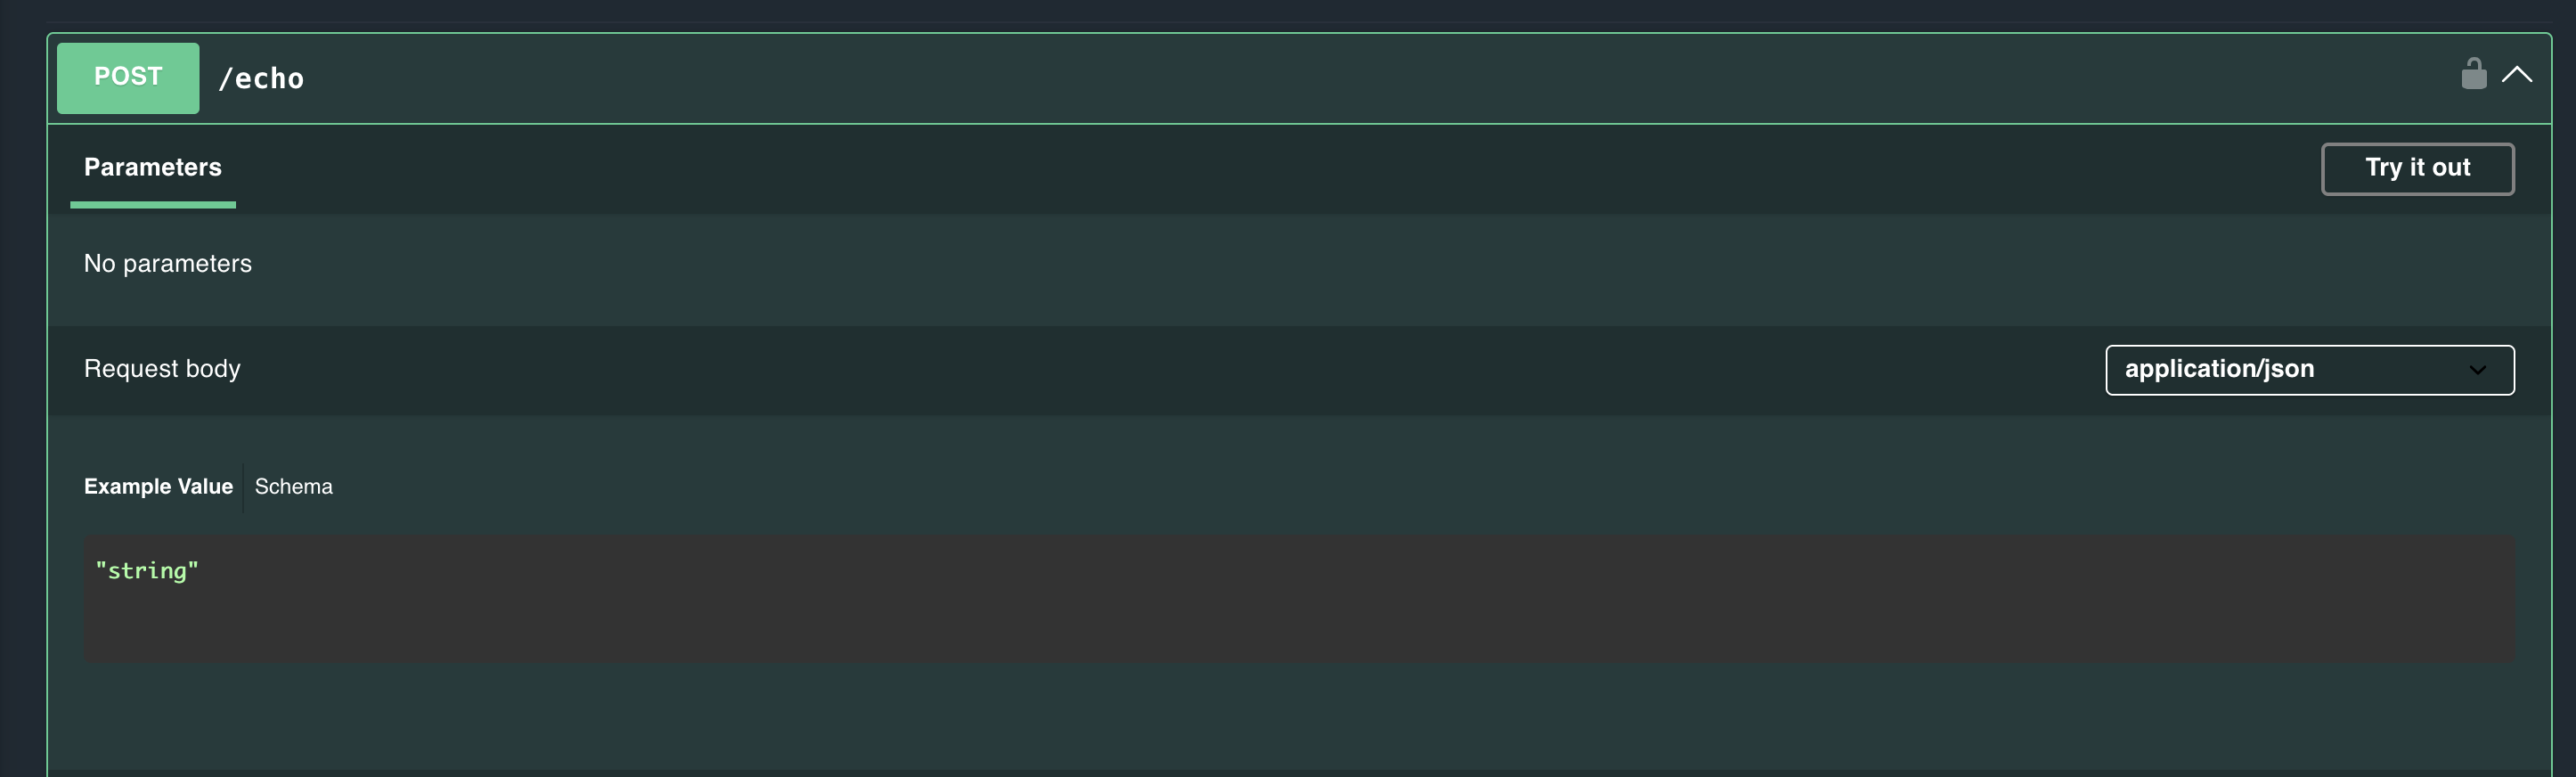
Use the documentation interface to view and test OpenAPI schemas directly in the browser. Expand an HTTP request type, such as POST, to show the parameters, expected request body, and possible responses, as shown in the following image:
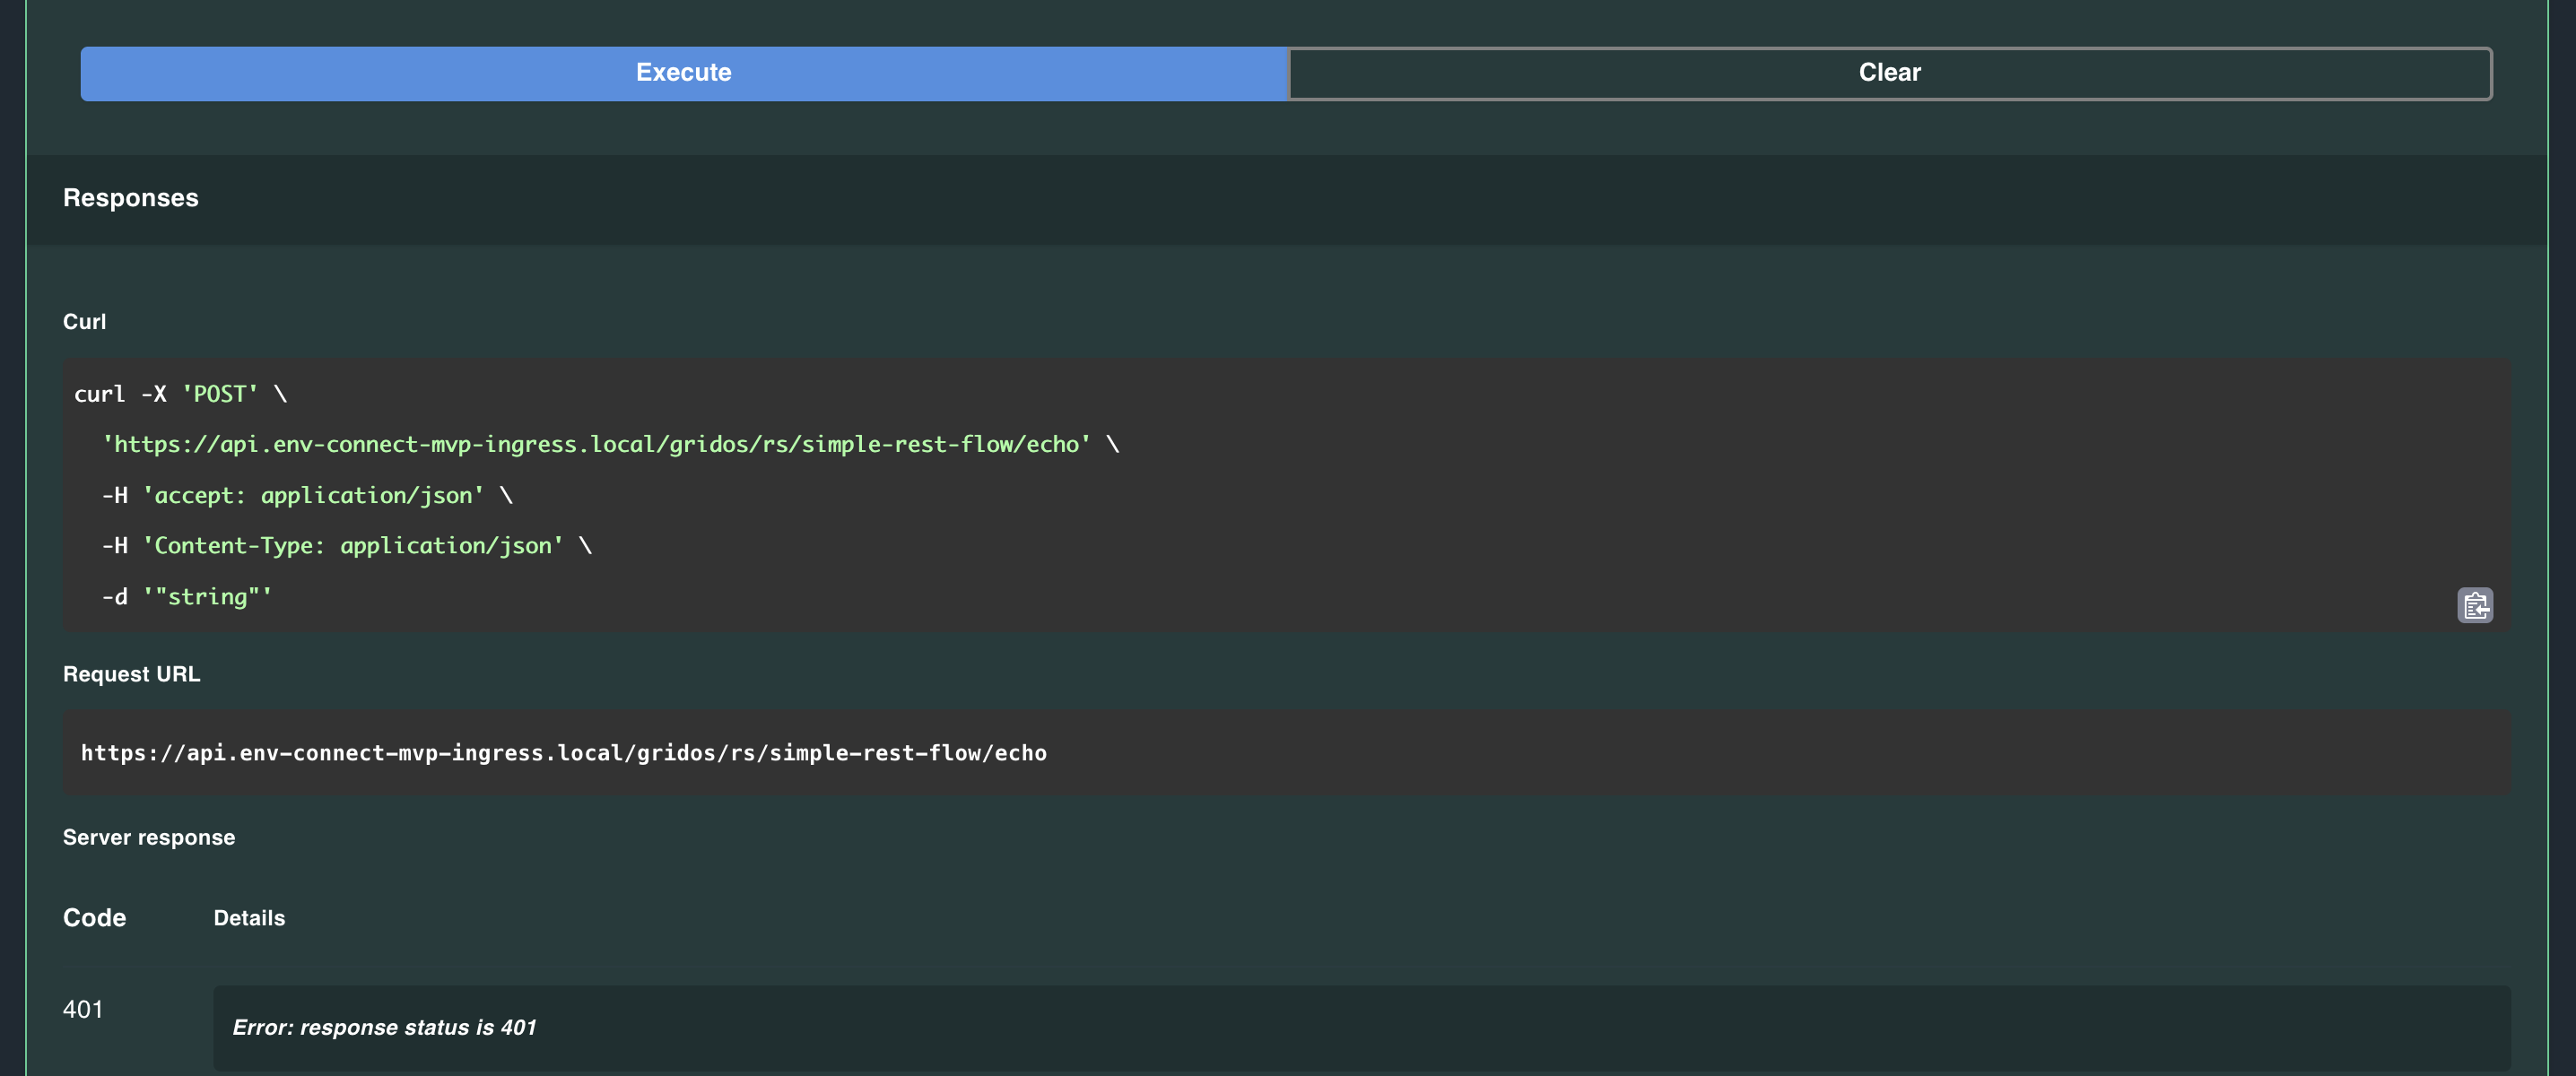
Select Try it out, and then select Send to send a request to the endpoint. The following image shows a POST request that returned a 401 status:
To use Try it out, complete the following steps:
-
Create a Heartbeat service account.
-
Grant the service account access to this flow.
-
Select Authorize and enter the service account credentials.
For steps on how to create and manage service accounts, see Flow access.
|
The Authorize button appears only if the OpenAPI schema includes the |
Flow Access
Flow Access displays a list of the Heartbeat Service Accounts that have access to this flow.
For more information on Heartbeat Service Accounts and how to create and manage access to flows, see Service accounts.