Install the Tools
Prerequisites
You need to install the following software to use Utilihive SDK and its Domain-Specific Language (DSL):
Java 25
The Java Development Kit (JDK) installer from Amazon Corretto automatically sets the necessary Java path variables. If you prefer using the CLI, install the Java 25 JDK using the Software Development Kit Manager (SDKMAN).
sdk install java 25.0.3-amzn|
Utilihive SDK versions earlier than 11.764.0 require Java 17, and versions 11.764.0 and later require Java 25. If you upgrade to 11.764.0 or later, install Java 25 and update your IntelliJ project. Uninstall Java 17 only if you no longer maintain projects that use SDK versions earlier than 11.764.0. To verify your JDK version, run: Your default |
Migrate to Java 25
Follow these steps to migrate your project to Java 25.
-
Close IntelliJ and stop any running Maven processes.
-
Install Java 25 and set it as the default version.
Run the following SDKMAN commands:sdk install java 25.0.3-amzn sdk default java 25.0.3-amzn -
Verify that the default Java version is 25 by running:
java -version -
Rebase your branches on the latest master branch built with Java 25.
If any local branches were built with Java 17, rebase them on the new master branch. -
Open IntelliJ and configure the project to use Java 25:
-
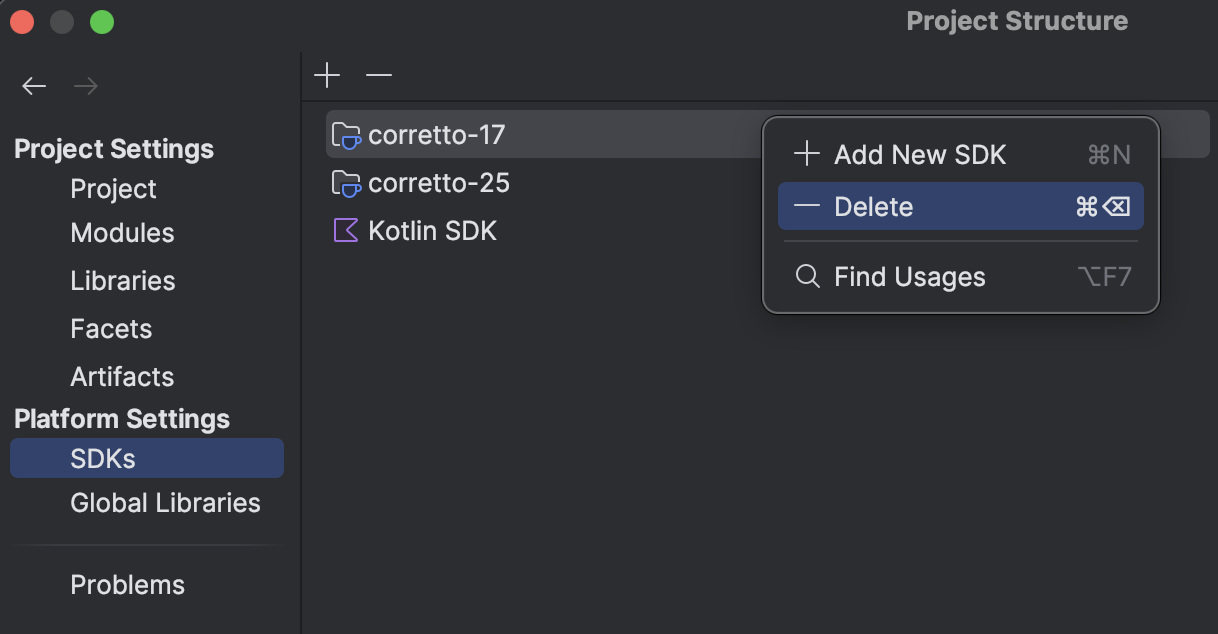
Go to . Add the Java 25 SDK. Delete Java 17 SDKs only if you no longer maintain projects that use SDK versions earlier than 11.764.0.
-
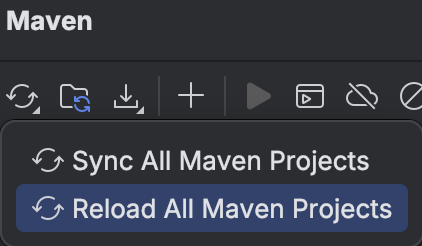
Refresh the Maven projects in IntelliJ.
-
Go to and do the following:
-
Set SDK to
corretto-25. -
Set Language level to
SDK default.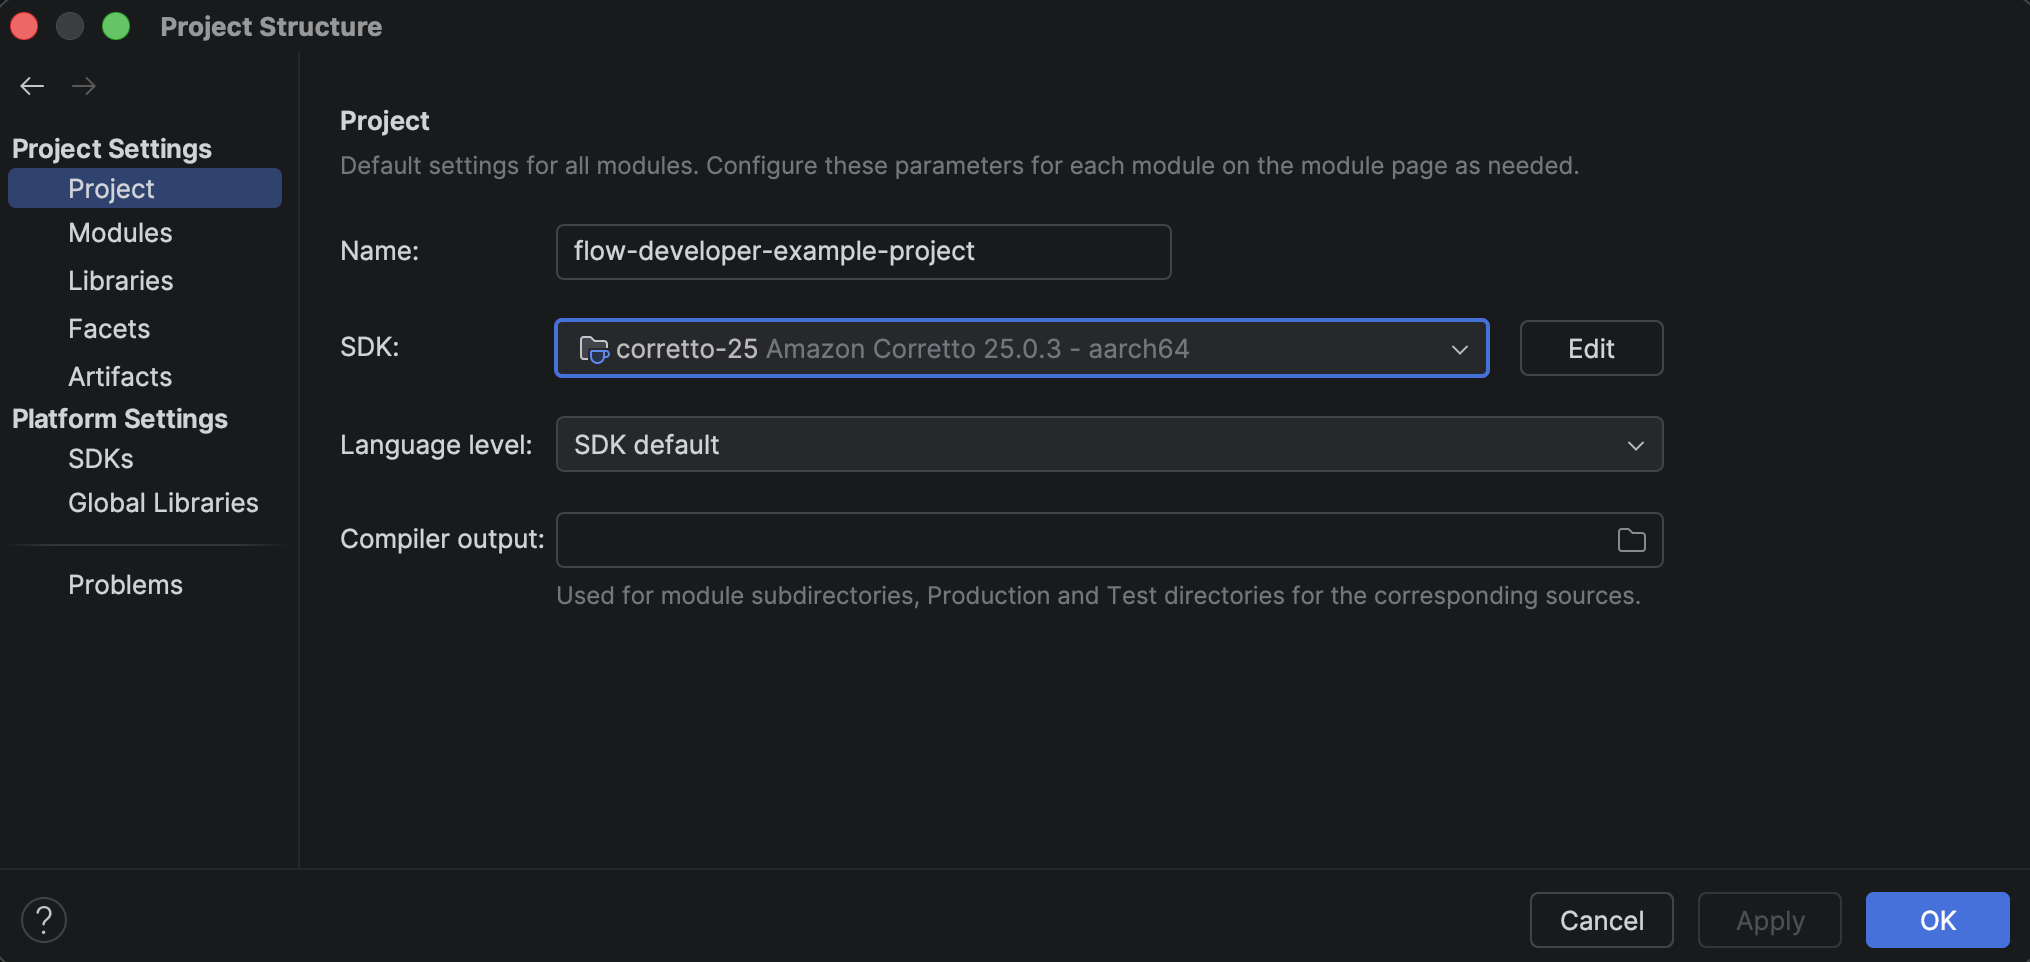
-
-
Confirm all modules have their Java language levels set to
25. -
Set each module’s Kotlin settings with Target platform set to
JVM 25, and Kotlin Language version and API version set to2.4.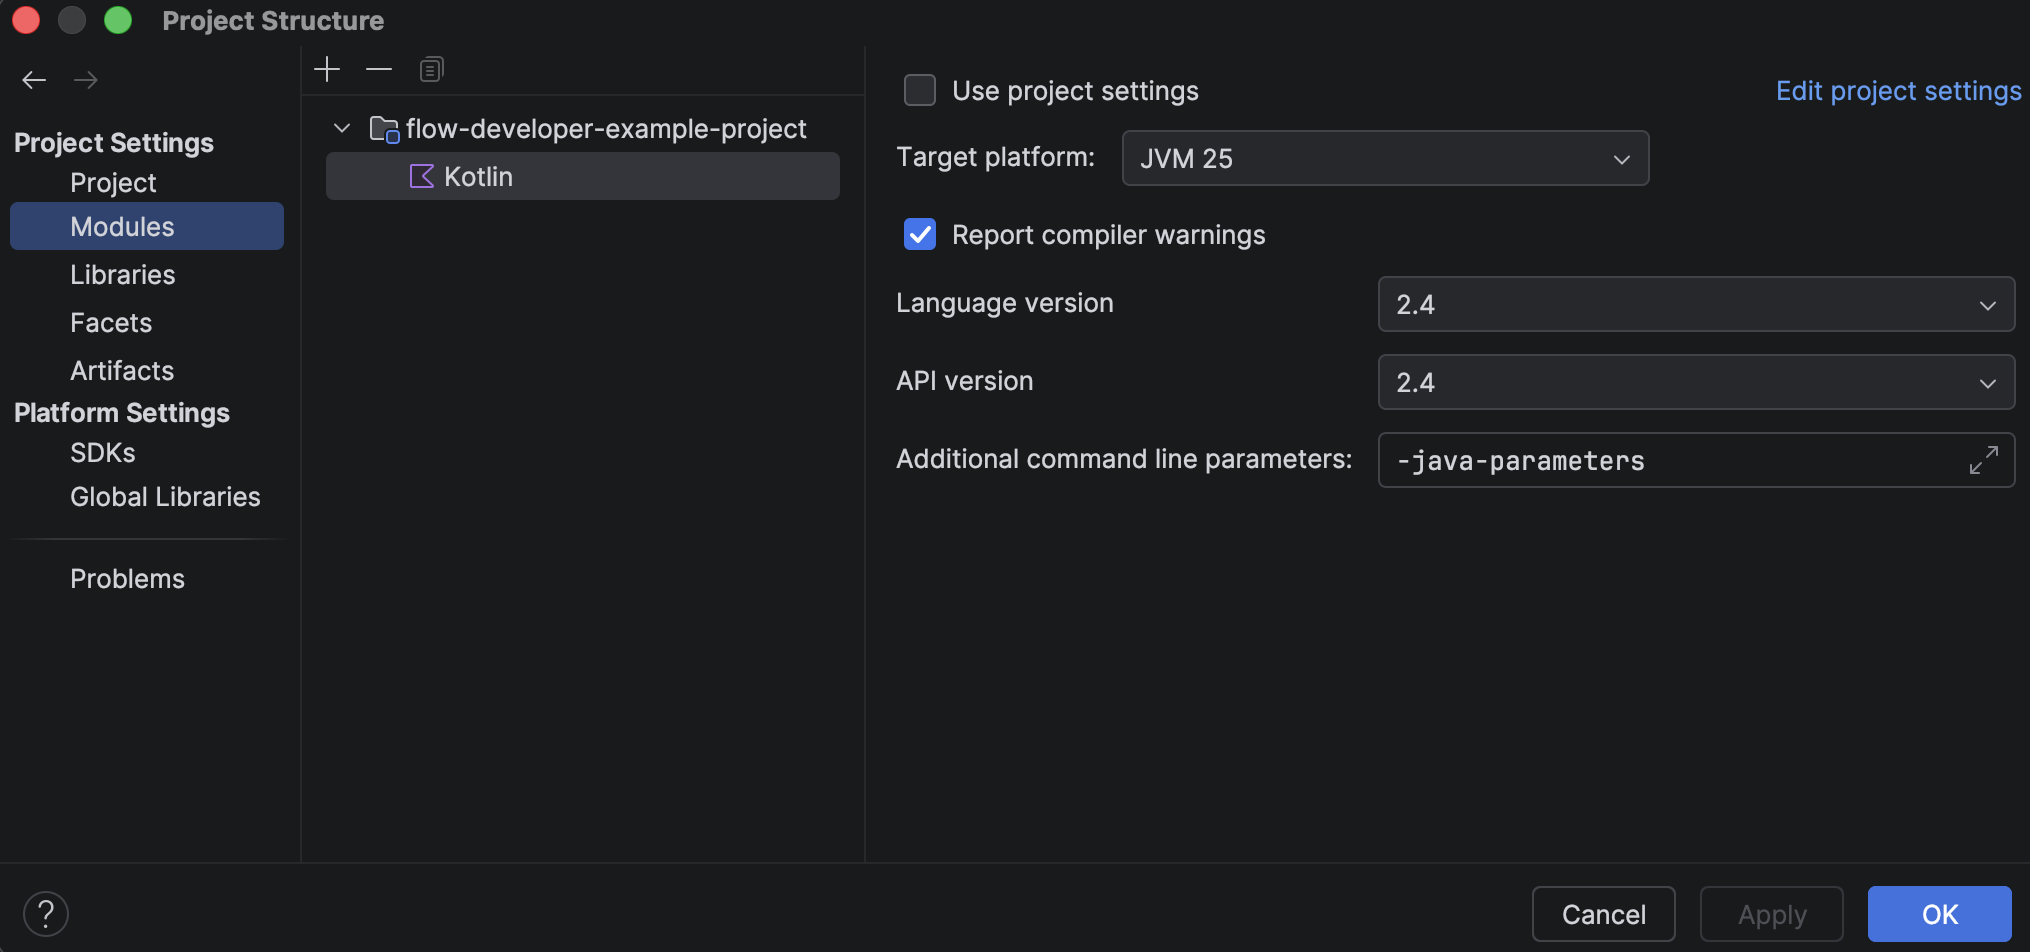
-
-
Run unit tests to verify that the project is working correctly with Java 25. If you encounter any issues, contact Utilihive Support for assistance.
|
If multiple JDK versions are installed, make sure your terminal, IntelliJ, and Maven all use Java 25 for this migrated project. Uninstall older Java versions only if you no longer maintain projects that require them (for example, Java 17 for SDK versions earlier than 11.764.0). |
IntelliJ IDEA
The IntelliJ code editor comes with built-in support for Kotlin and is the easiest way to work with the Utilihive SDK. The free version is sufficient for developing Utilihive integration flows.
|
The Linux bundle has the |
Git
Start with an example project, which is downloaded as a Git repository.
On Windows and macOS, install Git through IntelliJ during project setup.
Configure the SDK
The Utilihive SDK is installed as a project dependency using Maven. Only licensed users can access and use the SDK. If you need help with your license, contact Utilihive Support.
To configure Maven, you must have access to the GE Vernova Artifactory.
GE Vernova Artifactory Access
All Connect artifacts (Helm charts, Docker images, Maven dependencies, and installation tools) are stored on GE Vernova Artifactory.
Contact your GE Vernova Support representative for more information on how to get access to GE Vernova Artifactory.
Generate an Artifactory token:
-
Once logged in, click on Generate an Identity Token. The description should help you remember its purpose, e.g:
GridOS Connect Token. -
Click Next. The generated token is used as your password credential, with your SSO as the username.
Configure Maven
You can use the standalone Maven installer or the version embedded in IntelliJ. The next step is to configure Maven to use your licensed credentials.
Create a settings.xml file in the $HOME/.m2 directory.
On Windows, this would be: C:\Users\<username>\.m2.
|
If the |
Add the following configurations to your settings.xml file:
Set the ARTIFACTORY_USR and ARTIFACTORY_PSW environment variables to your Artifactory credentials.
Set Up the Project
Use the Example Project
To use the Utilihive SDK, it is recommended to start with the official example project. It comes preconfigured with dependencies, tests, and sample configurations. Clone the project from the following GitHub URL:
https://github.com/utilihive/flow-developer-example-project-mvn.gitOpen IntelliJ, go to , enter the GitHub URL, and select Clone.
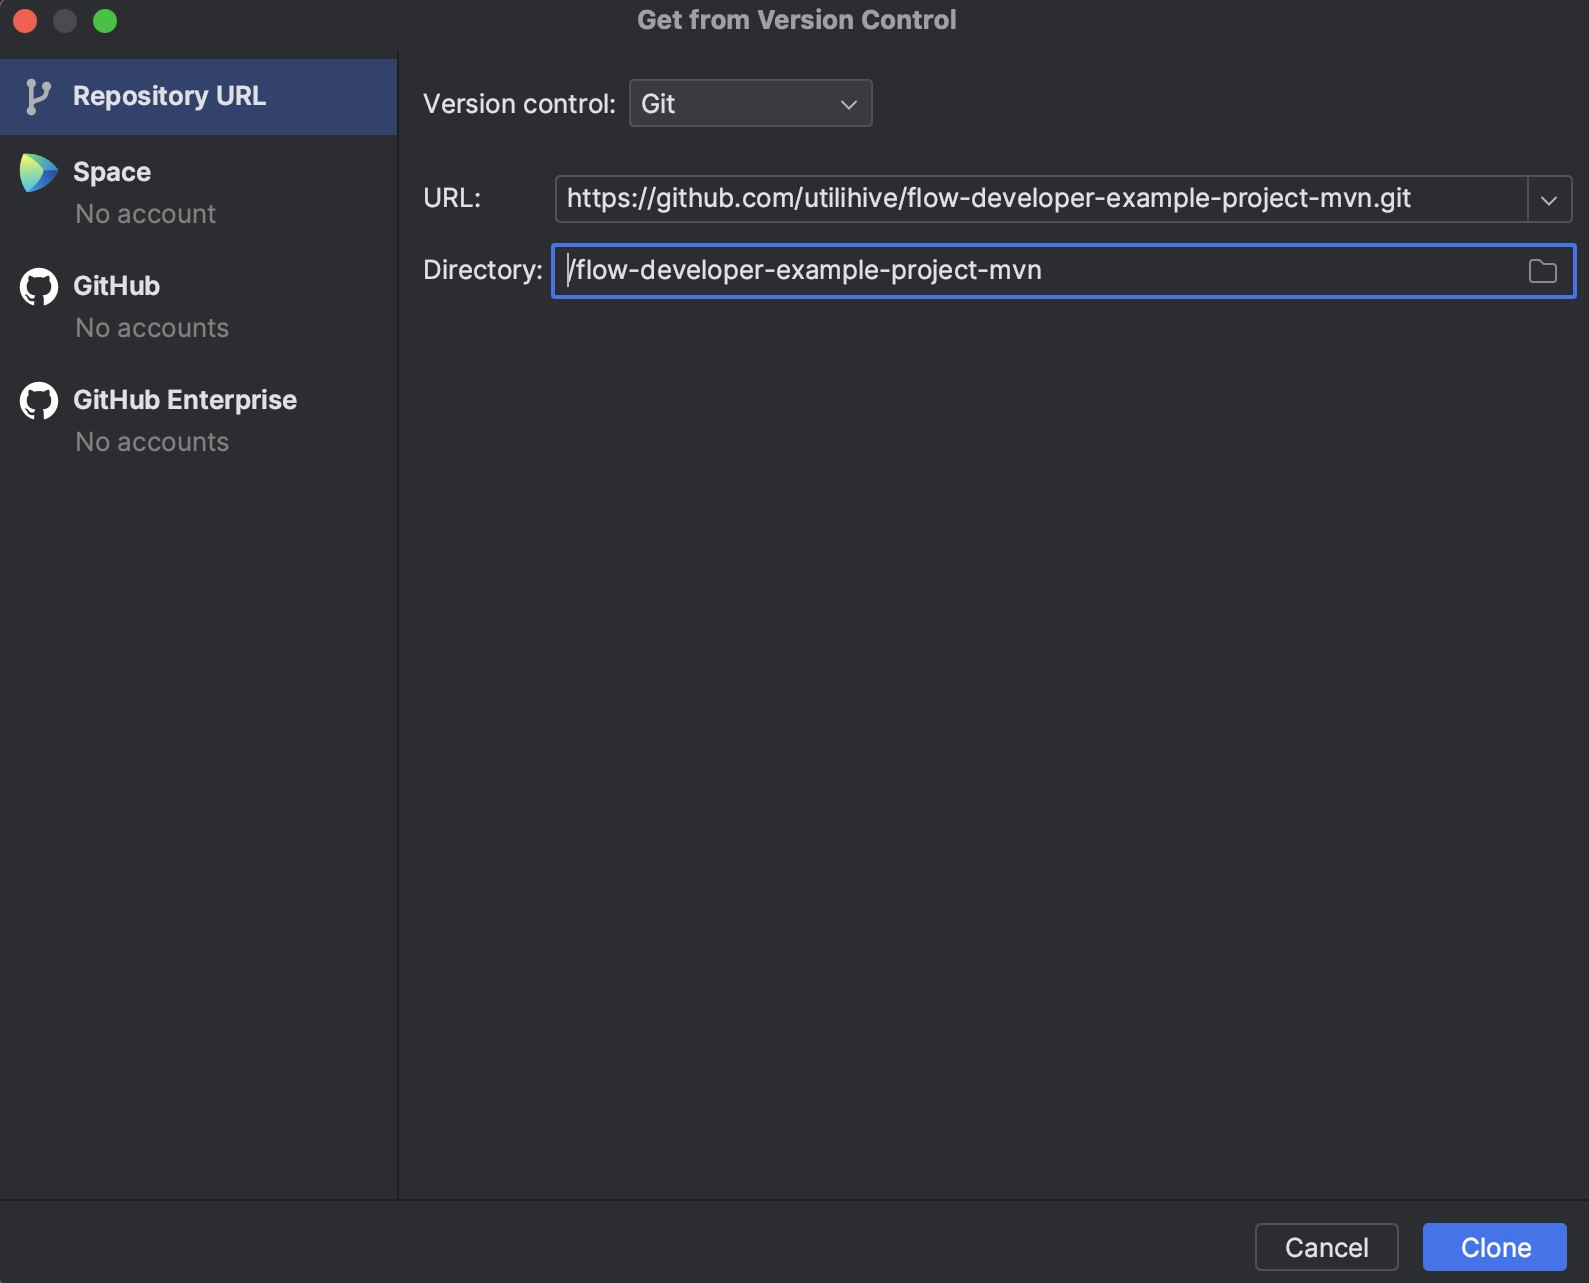
Once you have cloned the project, open in IntelliJ and verify that it is using the correct JDK. Go to , then under , select , and select OK.
It may take a few minutes for IntelliJ to download the project’s dependencies.
| On Windows, IntelliJ might show a warning about Defender slowing things down. If this occurs, select Exclude directories to avoid unnecessary virus scans on your project and IDE folders. Apply similar exclusions for other antivirus programs and operating systems. |
Configure the Repository in pom.xml
Make sure the server ID in your settings.xml file matches the repository entry in the pom.xml file of the example project.
<repositories>
    <repository>
        <id>gev-artifactory</id>
        <url>https://gart.software.gevernova.com/artifactory/gridos-connect-sdk/</url>
    </repository>
</repositories>
Kotlin 2.4
The current versions of the Flow Developer SDK depend on Kotlin 2.4.
When installing or updating the SDK, complete the following steps in IntelliJ to configure the correct Kotlin language level.
-
Go to .
-
Set the SDK to
corretto-25and the Language level toSDK default. -
Set the Kotlin dependency version to
2.4.x, where x is the latest patch version of the Kotlin runtime. -
Refresh the Maven project in IntelliJ.
-
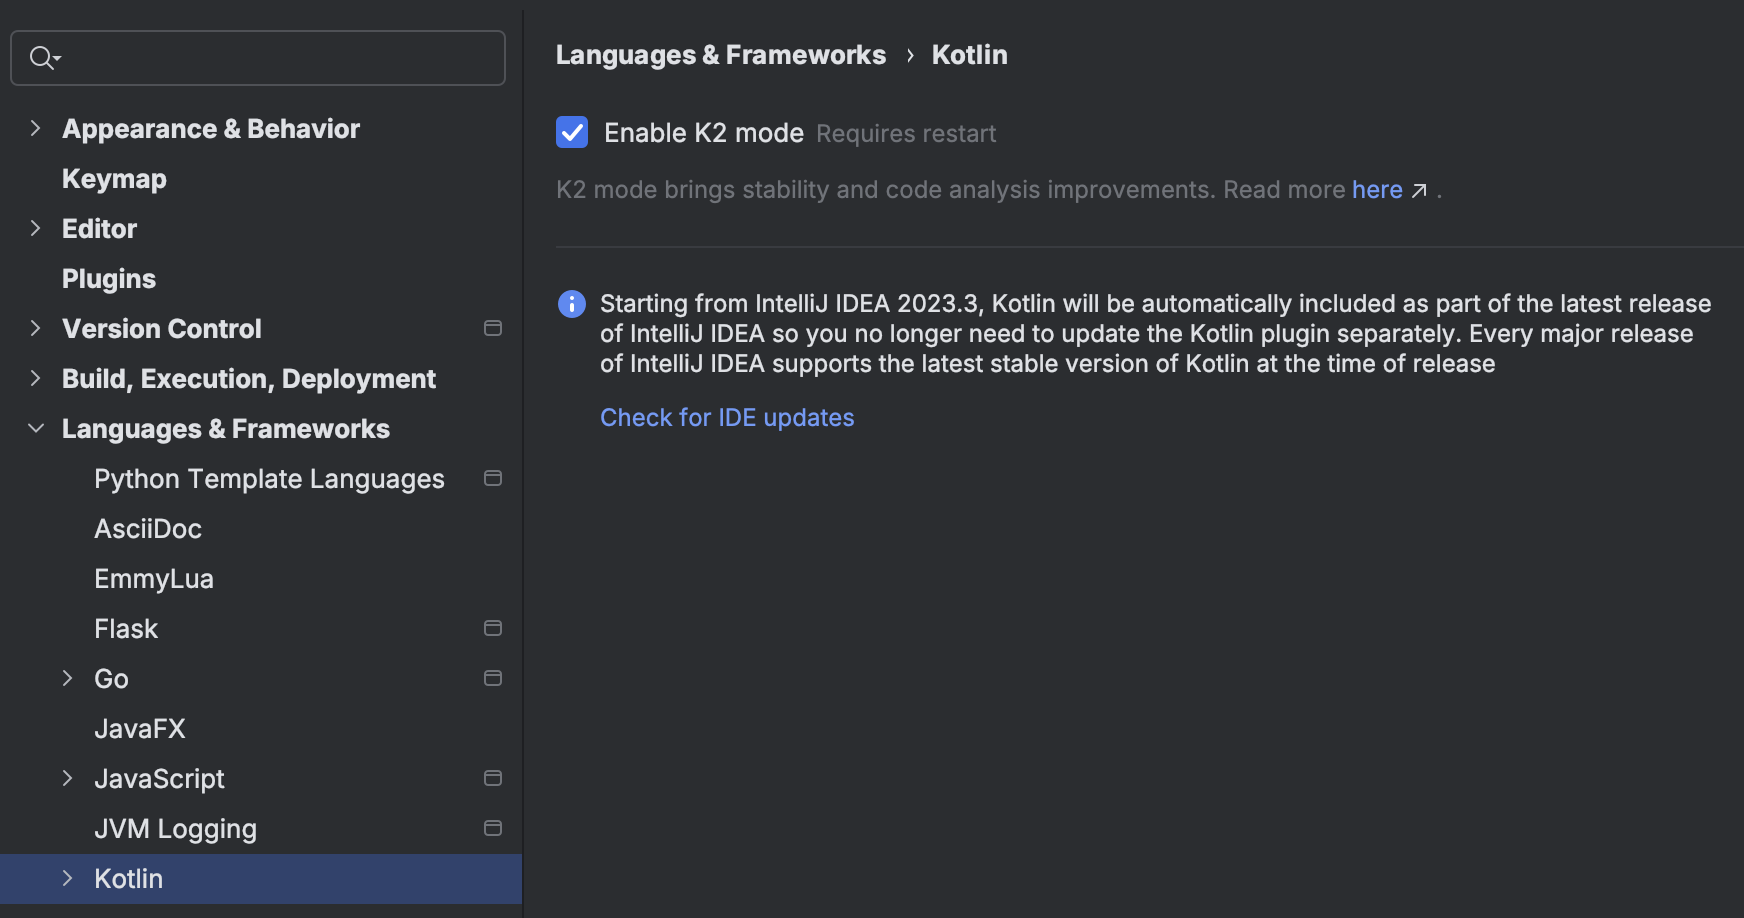
Enable the K2 compiler in the IntelliJ Kotlin settings. Select Settings on the right navigation bar, then choose , and turn on Enable K2 mode.
-
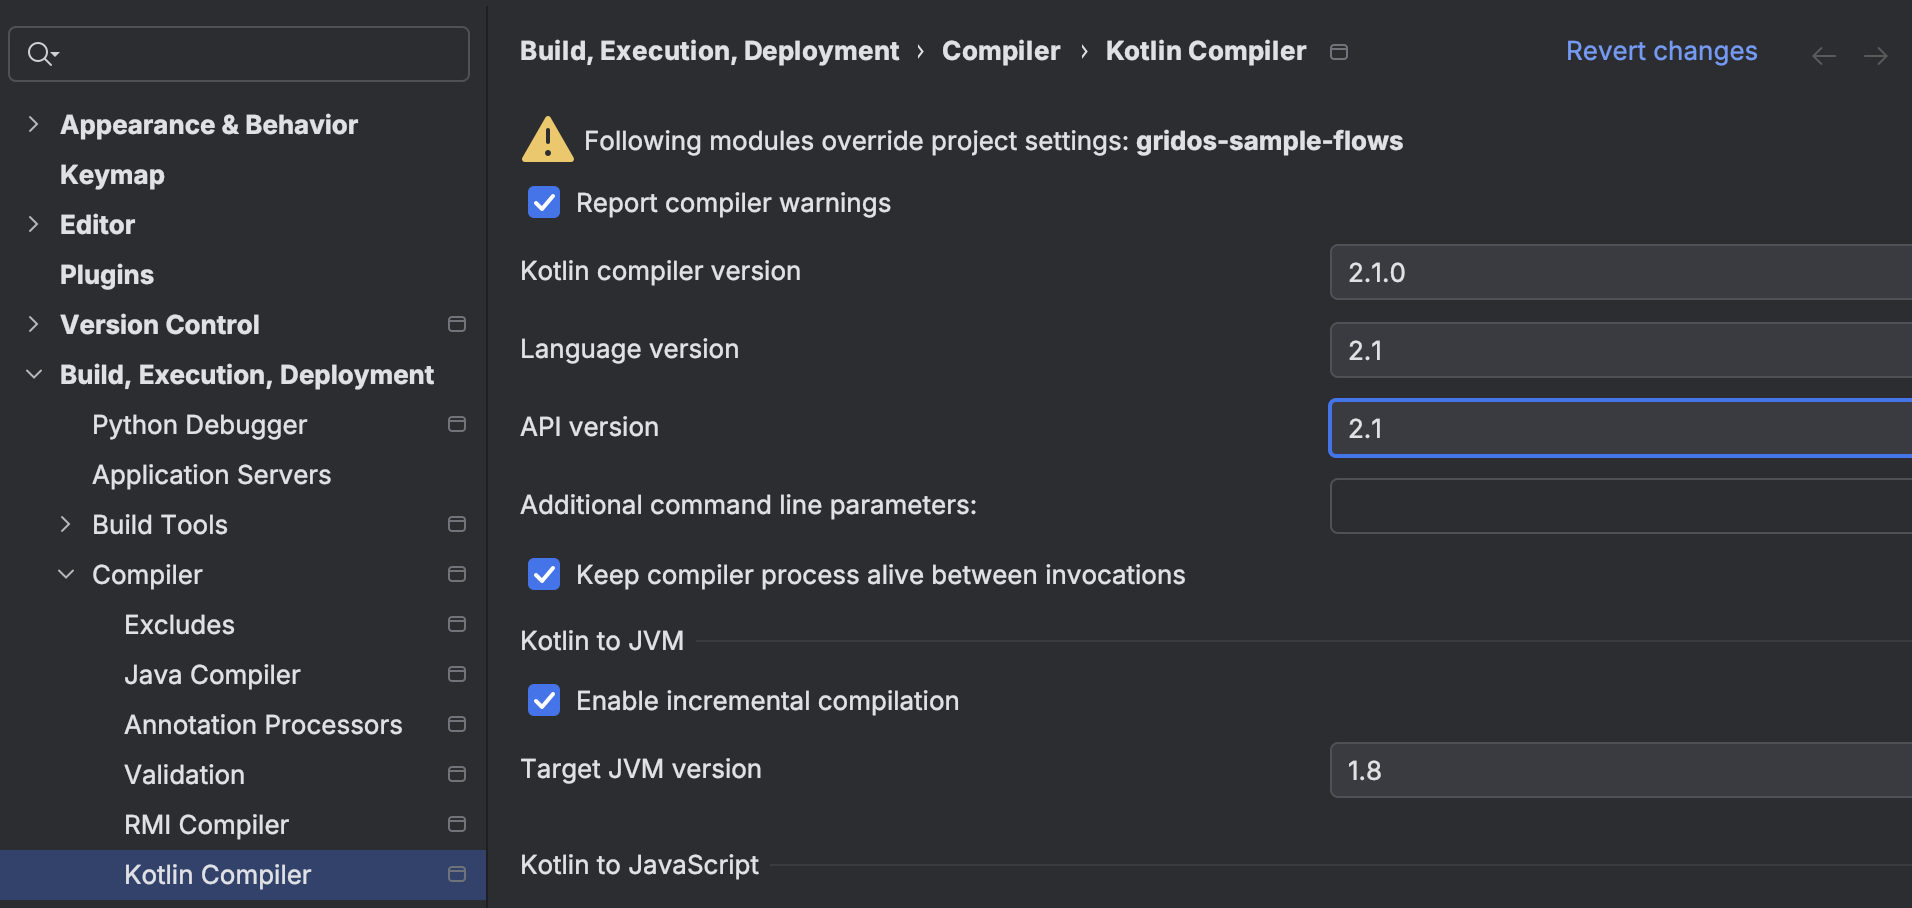
Verify the Kotlin compiler settings are set to 2.4.
-
Make sure each module’s Kotlin language level is set to 2.4 or delegating to the project settings.
Set Up the Project Manually
If you start from an empty IntelliJ project, add the required dependencies to your pom.xml file, including the Utilihive SDK.
Use the example project’s pom.xml as a reference.
Download Source Files
Whether you are using the example project or your own, it is recommended that you download the Maven sources for the SDK dependencies.
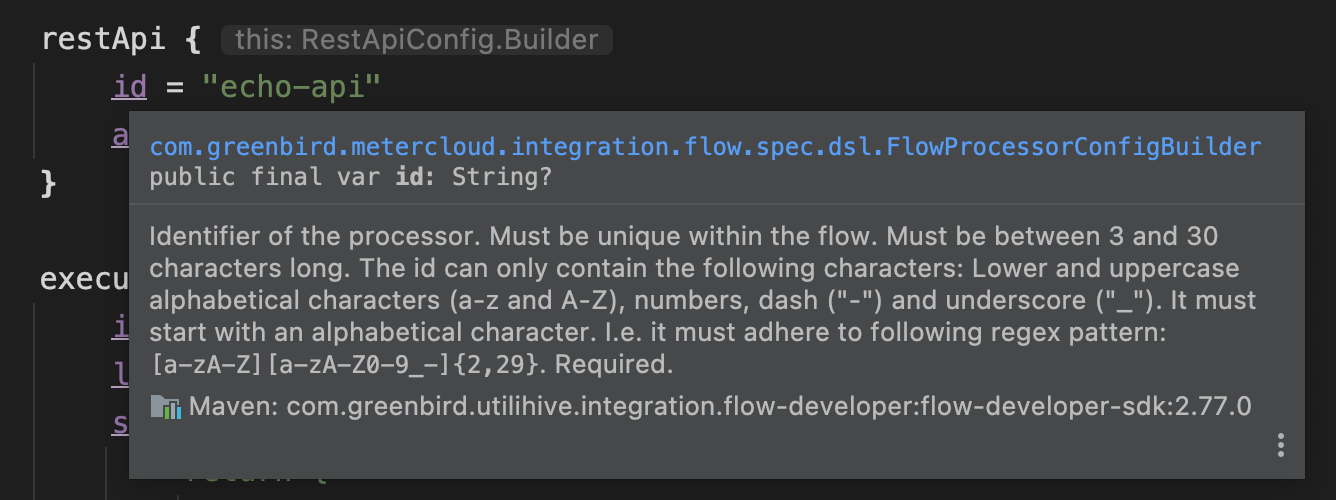
This enables IntelliJ to display contextual documentation when you hover over processor properties.
For example, the following image shows documentation for an id property:
To enable this feature in IntelliJ:
-
On Windows or Linux, select . On macOS, select .
-
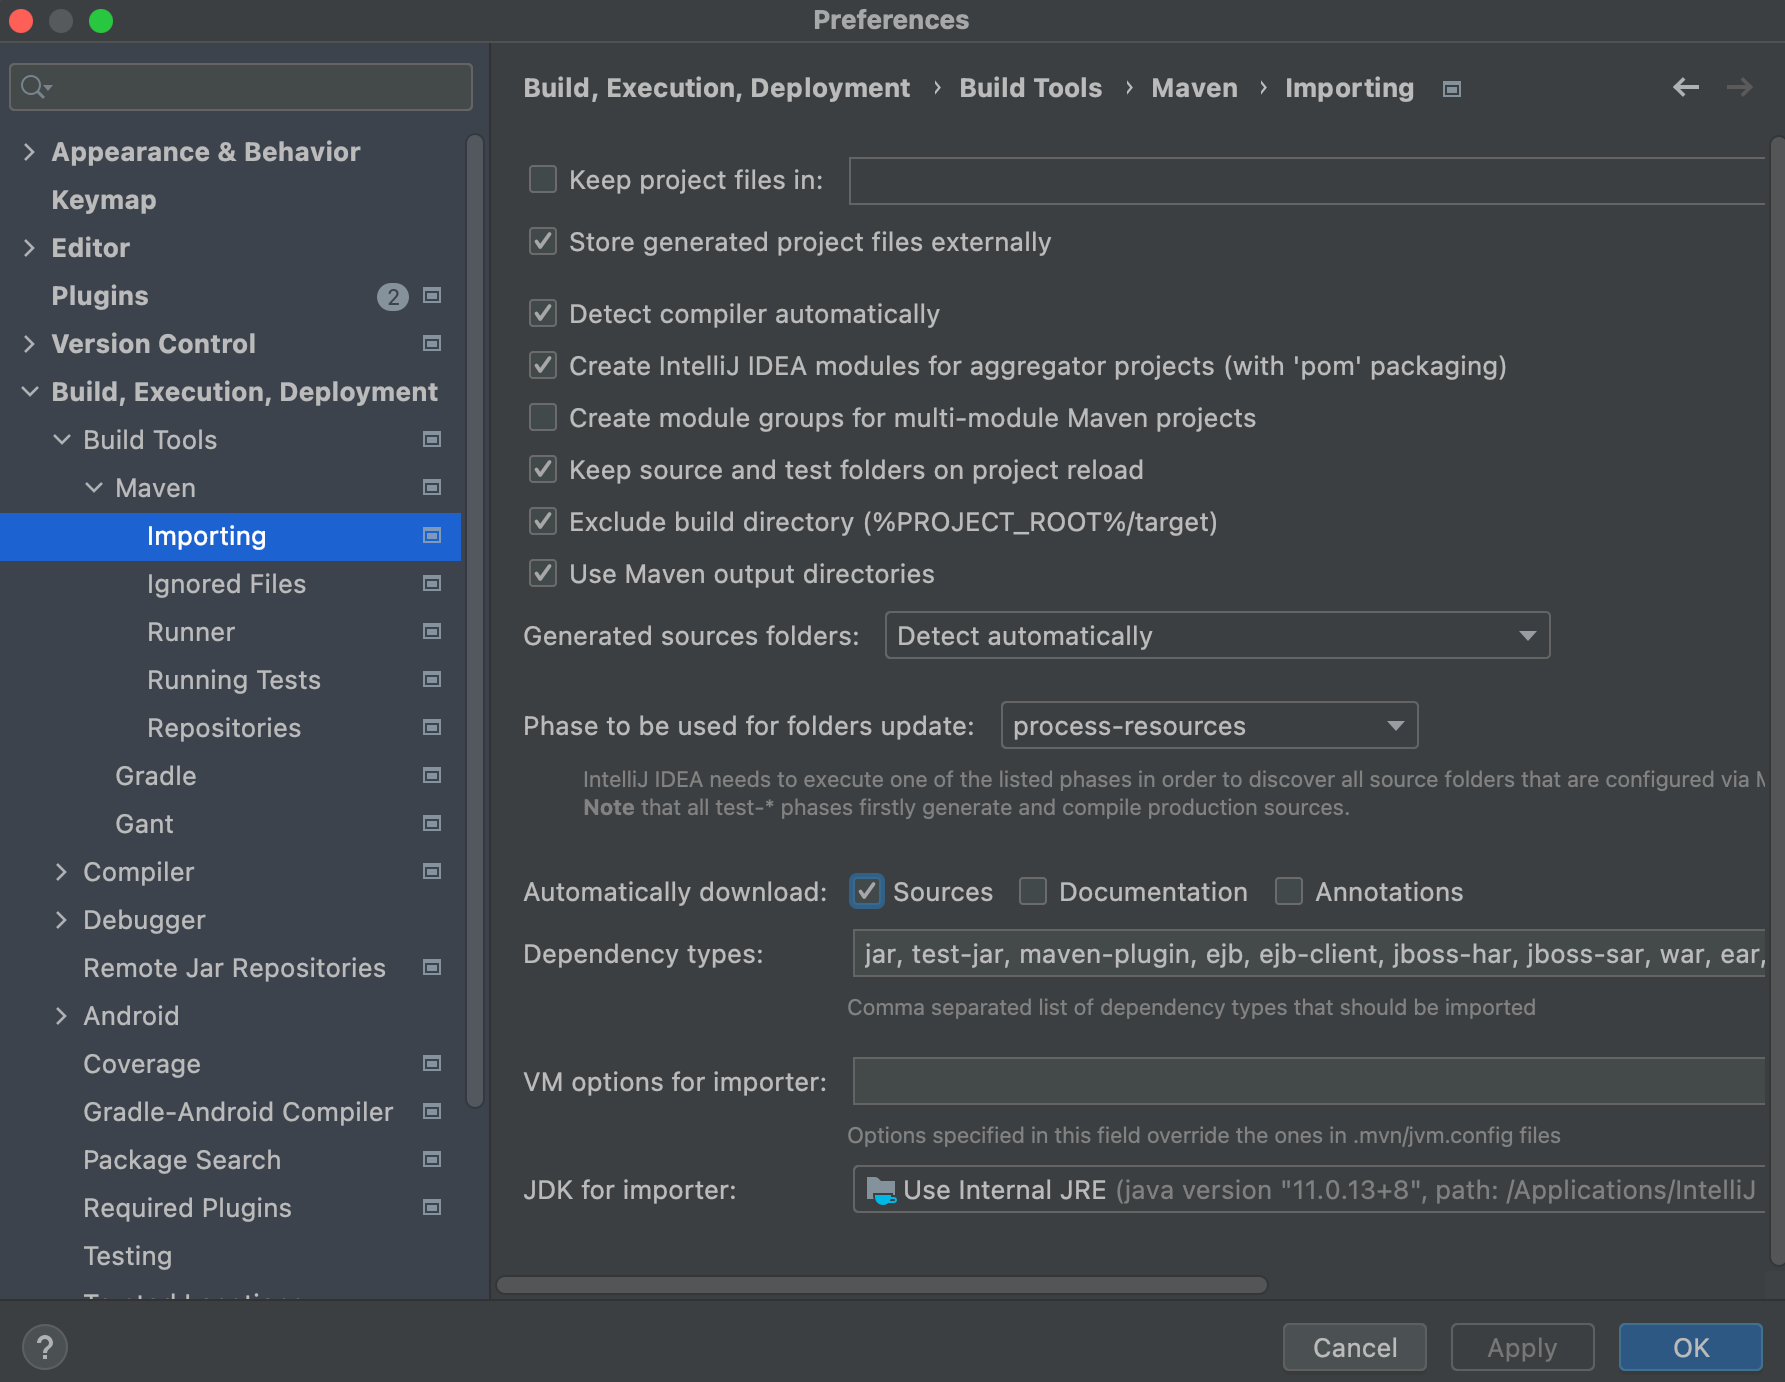
Go to .
-
In the Automatically download section, make sure the Sources option is selected.
-
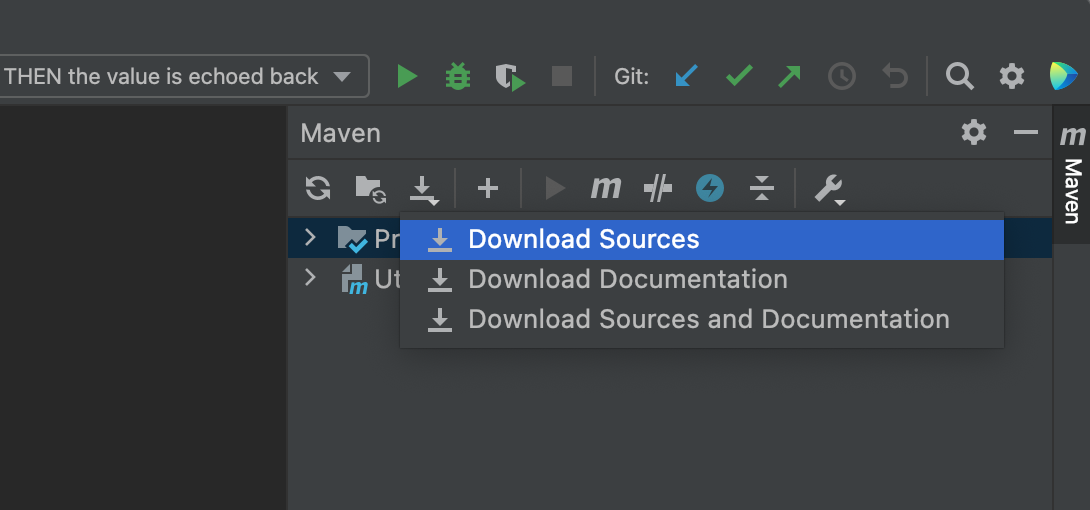
If you do not want Maven sources to download automatically or if automatic download does not work, you can manually trigger the download. Open Maven tool window on the right and select .
JSONiq Language Support IntelliJ Plugin
Utilihive data mapping is done using the JSONiq query language. We provide a plugin for IntelliJ that supports syntax highlighting for both JSONiq files and inline JSONiq code.
You can request the installation file from Utilihive Support. The plugin is provided as a ZIP file.
Once the ZIP file is downloaded, to install:
-
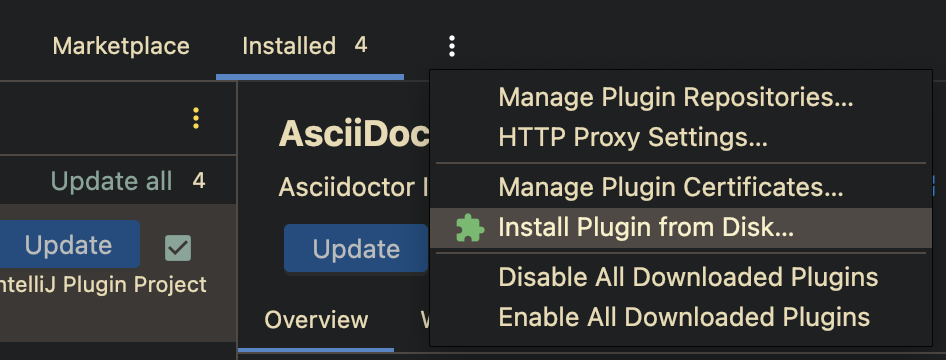
Go to .
-
In the tabs section, click the three stacked dots (or the cog wheel icon in newer versions of IntelliJ), select Install Plugin from Disk, and select the ZIP file.
-
Restart IntelliJ to apply the changes.
Usage
In JSONiq files (.jq or .jqy file extensions), syntax highlighting is enabled by default. Use the language annotation provided by IntelliJ to highlight the inline code. The following syntax displays inline code:
@Language("JSONiq")
val mapper = """
Your JSONiq code here
""".trimIndent()

// If the @Language annotation is not available, use the following syntax:

//language=JSONiq
val mapper = """
Your JSONiq code here
""".trimIndent()
For more information on language support for IntelliJ, see IntelliJ Language Injection.
Advanced Setup
This setup includes application overrides for port numbers and cleanup tasks.
Application Overrides
The test server that comes with the Utilihive SDK can be configured by editing the file located at $HOME/utilihive/server/application-override.properties on your computer.
The utilihive directory won’t be created until the first time the test server attempts to start. For information on how to start the server from a unit test, check out the flow tutorials.
|
The initial application-override.properties file comments out every possible configuration option, where each property is set to its default. For example:
# The maximum age a flow can have before it is purged. Default 30 minutes.
# flowDeveloper.serverComponents.flow.timeToLiveMillis=1800000
Ports
The most important properties you might want to change would be the ports that the server runs on. If the default ports are already in use by other processes, uncomment and change the following properties:
server.port=8070
management.server.port=8071
Note that server.port refers to the main test server while management.server.port handles separate endpoints for things like manually shutting down the server.
| Make sure the current server is shut down before changing the port. See the Troubleshooting documentation for more information. |
Cleanup
The only other property you might want to change would be the following:
flowDeveloper.serverComponents.cleanup.active=trueThis defines whether or not to enable cleanup tasks on the test server. Setting this to false will make the server stop purging outdated flow deployments that the unit tests might have left behind. It is highly recommended to leave this on for normal use and should only be switched off after talking to support.
Next Steps
Now, you have set up a project, see flow tutorials for the next steps.