Installing the Tools
Prerequisite Downloads
The following software is required to use the Utilihive SDK and corresponding DSL:
-
The Java Development Kit (JDK) installer from Amazon Corretto will automatically set the necessary Java path variables for you. If you prefer using the command line instead, a Java 17 JDK can be installed with the SDKMAN tool.
Utilihive SDK version 10.x and older required Java 11. If you are upgrading Utilihive SDK from an older version, make sure to install Java 17 and update your Intellij project to use it. In this case, it is best to uninstall Java 11 to avoid confusion.
It is a requirement that your defaultjavacommand is at version 17.
When you runjava -versionon your command line, it must report jdk version 17. If this is not the case, you need to either set Java 17 as the default or uninstall any other versions of Java from your machine. -
The IntelliJ code editor comes with built-in support for Kotlin and is the easiest way to interface with the Utilihive SDK. The free Community edition of IntelliJ is sufficient.
Linux users, make sure to read the Install-Linux-tar.txtfile for help on how to start IntelliJ after downloading it. -
It’s recommended to start with an example project, which is downloaded as a Git repository. Windows and macOS users can optionally install Git through IntelliJ as part of the project setup.
SDK Configuration
The Utilihive SDK is installed as a project dependency with Maven. However, only licensed users are able to access and use the SDK. If you need help with your license, please contact Utilihive Support.
In order to set up Maven correctly, you need to have access to GE Vernova Artifactory.
GE Vernova Artifactory Access
Contact your GE Vernova Support representative for more information on how to get access to GE Vernova Artifactory.
Generate an Artifactory token:
-
Go to: https://dig-grid-artifactory.apps.ge.com/ui/user_profile
-
Once logged in, click on Generate an Identity Token. The description should help you remember its purpose, e.g:
GridOS Connect Token. -
Click Next. The generated token is used as your password credential, with your SSO as the username.
Maven Configuration
The generated token can be used as the password for the GE Vernova Artifactory repository in your Maven settings.xml.
The Maven build tool can be downloaded as separate software, but the embedded version of Maven that comes with IntelliJ will also work.
Whichever version you use, the next step is to configure Maven to use your licensed credentials.
On your computer, create a settings.xml file in the $HOME/.m2 directory.
For Windows, this would be C:\Users\<username>\.m2.
|
The |
In the settings.xml file, add the following code:
Lastly, insert your own credentials in the <username> and <password> elements.
If you already have a settings.xml file, add the gev-artifactory <server> element to the existing list of servers.
|
Project Setup
Example Project
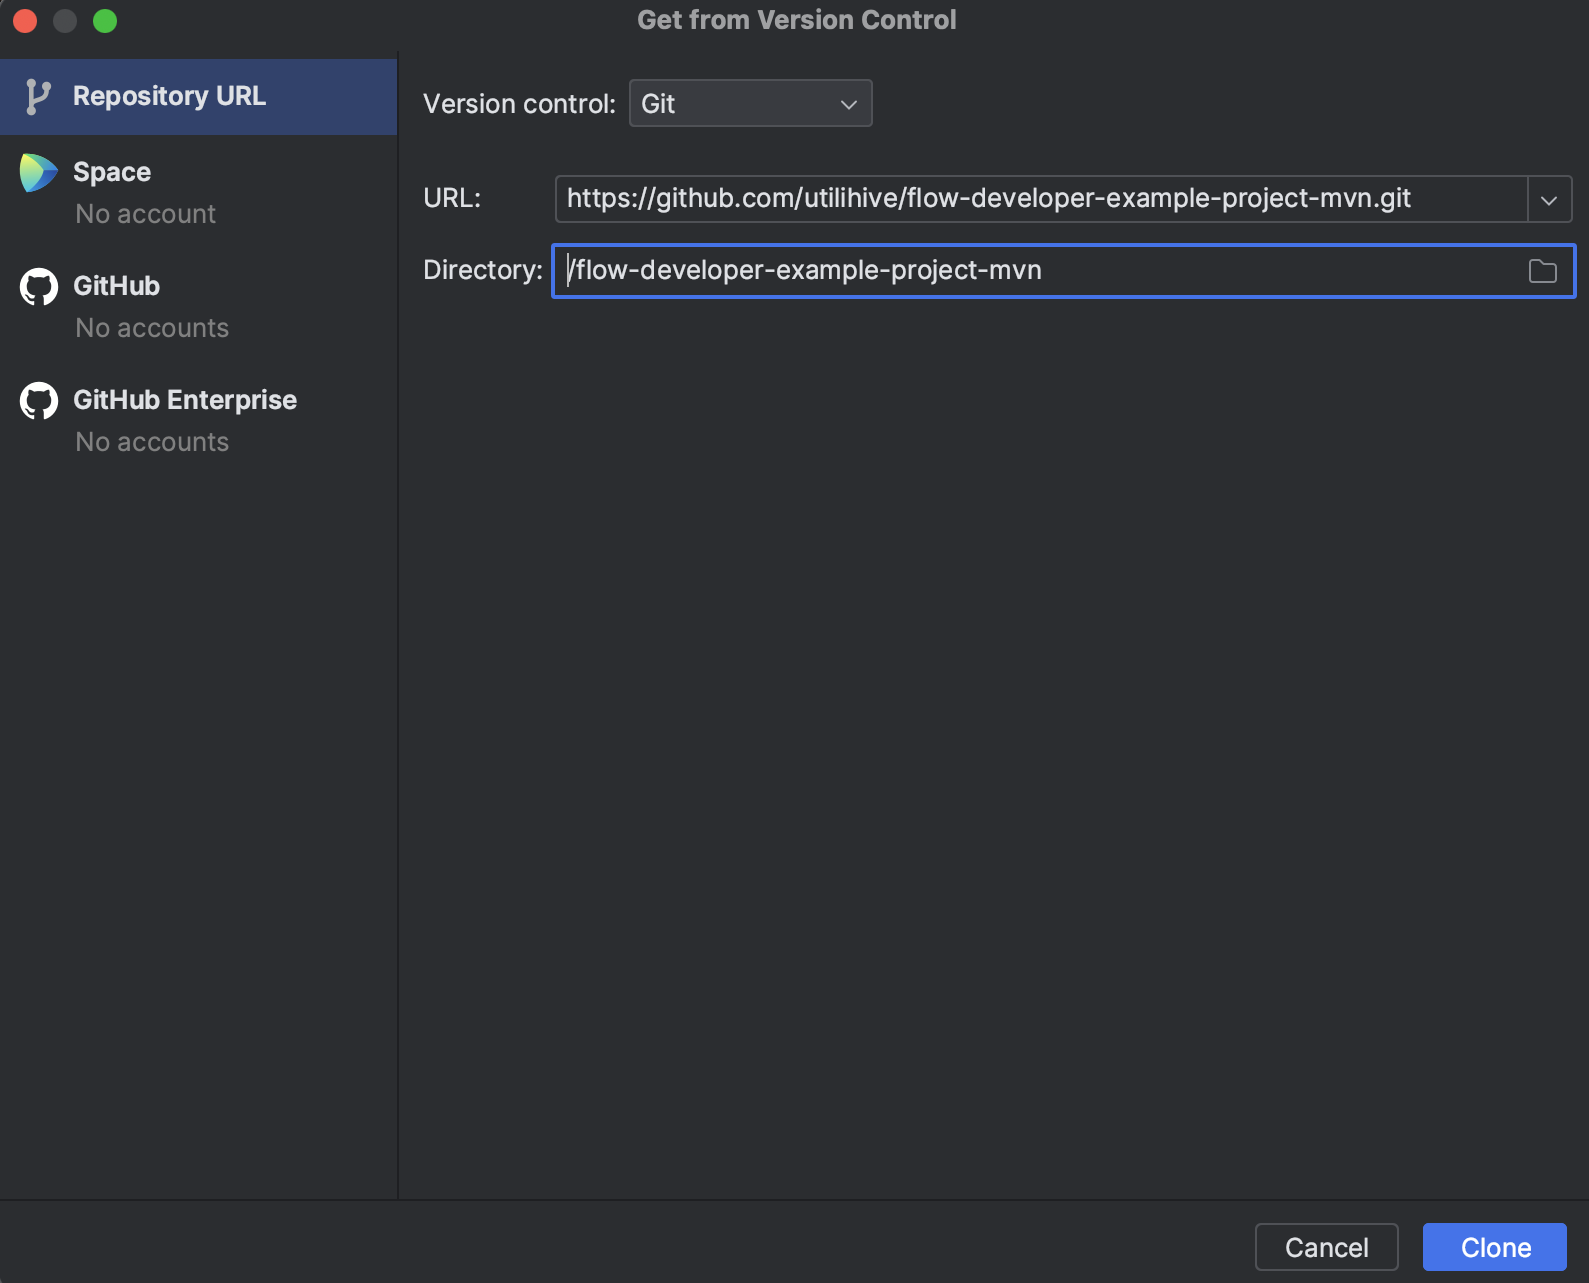
The recommended approach for using the Utilihive SDK is to start with the official example project. This scaffolded project already has the dependencies needed to run the included tests and sample configurations. It can be cloned from the following GitHub URL:
https://github.com/utilihive/flow-developer-example-project-mvn.gitOpen the IntelliJ editor and select File > New > Project from Version Control. Enter the GitHub URL and select Clone. The following image demonstrates what this process looks like:
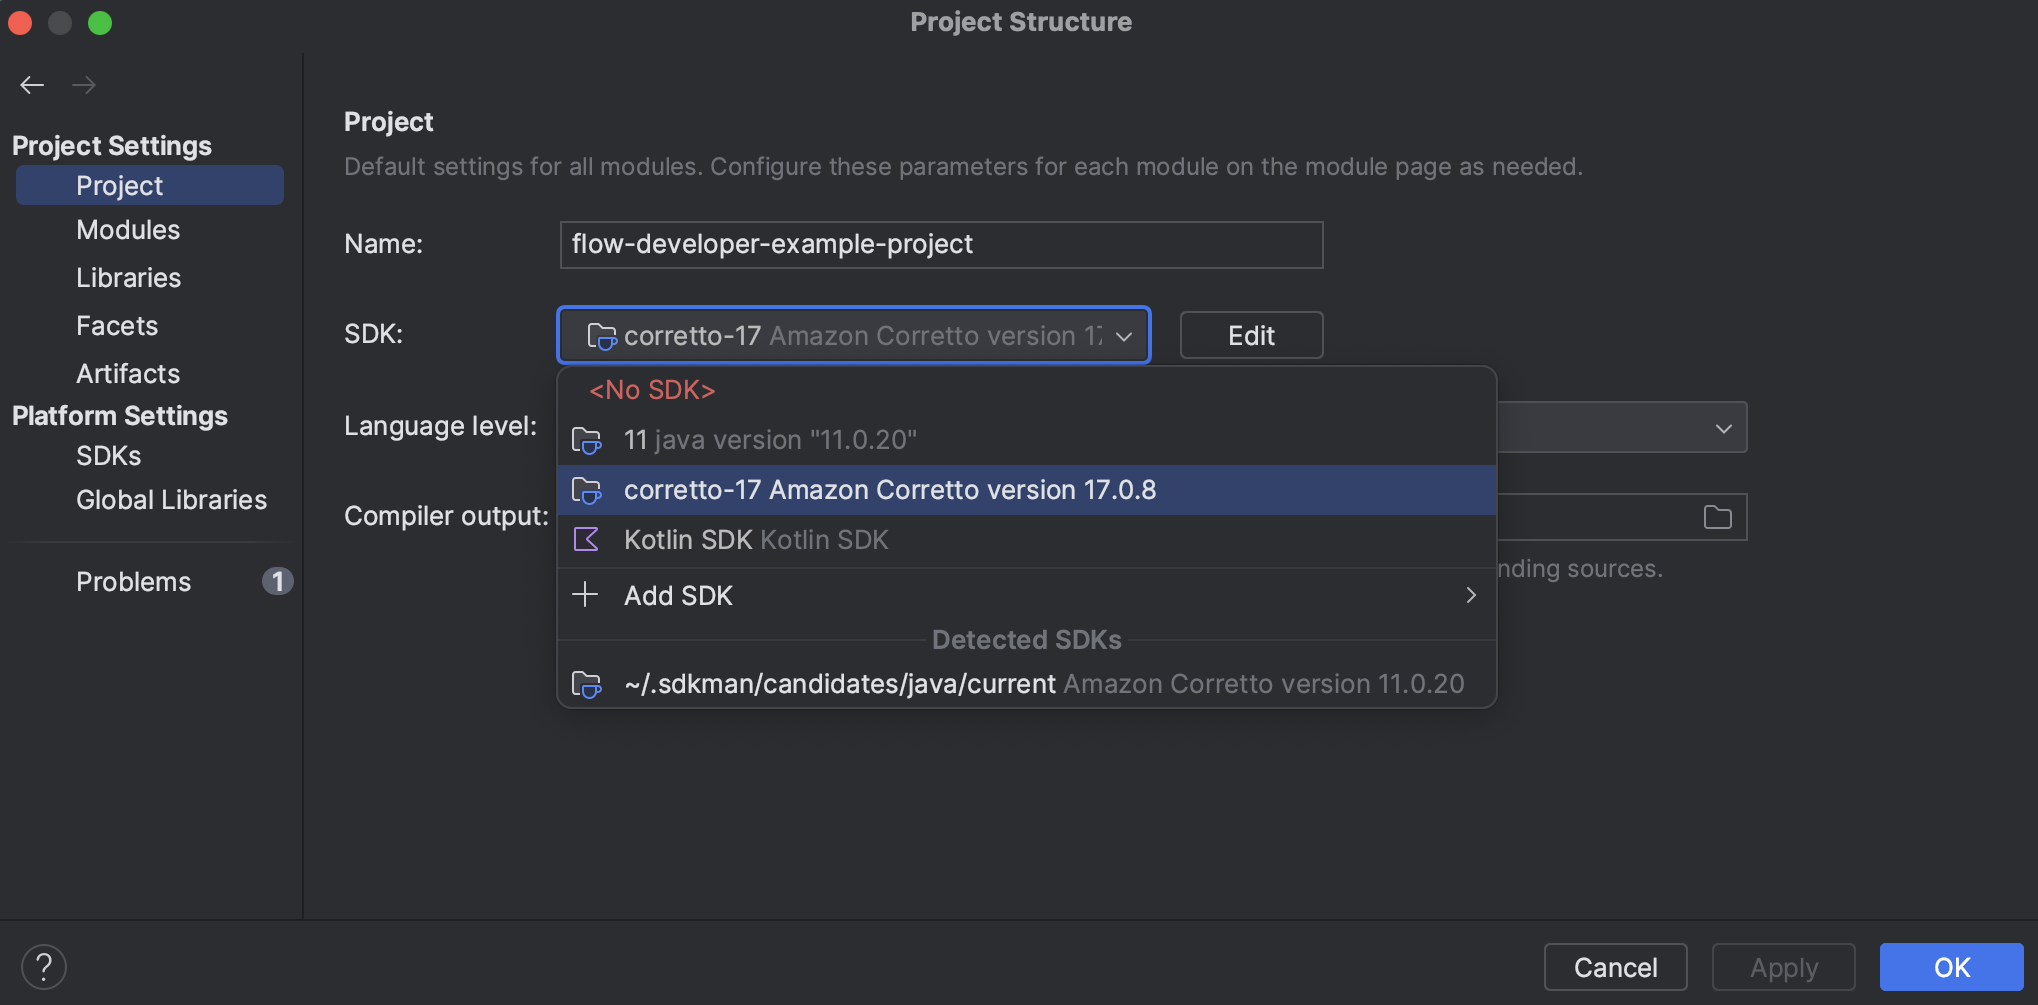
After the project has been cloned and opened in IntelliJ, verify that it’s using the correct JDK by navigating to File > Project Structure. Under the Project SDK setting, make sure the Java 17 JDK is selected and not <No SDK>. The following image demonstrates what you should see:
Wait a moment for IntelliJ to finish downloading the project’s dependencies, and then you’re all set!
| Windows users might see a pop-up warning about Windows Defender affecting performance. If you see this, select "Exclude directories" to prevent unnecessary virus scans on your project and IDE directories. For other antivirus programs and other OSs, it’s recommended to configure similar exclusions. |
Ensure correct repository configuration in pom.xml
Ensure the server id in your settings.xml file matches the repository entry in the pom.xml file of the example project.
<repositories>
    <repository>
        <id>gev-artifactory</id>
        <url>https://dig-grid-artifactory.apps.ge.com/artifactory/gridos-connect-sdk/</url>
    </repository>
</repositories>
Ensure Kotlin 2.1
Current versions of the flow developer SDK depend on Kotlin 2.1.
When installing or updating the SDK, flow developers must perform the following actions in Intellij to ensure the correct Kotlin language level.
Update the kotlin dependency versions to 2.1.x, where x is the latest bugfix version of the Kotlin runtime.
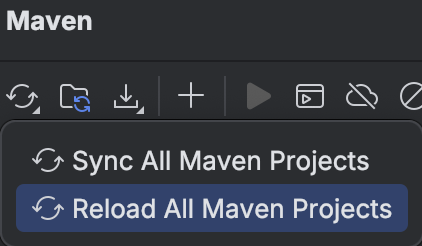
Refresh the Maven project in Intellij:
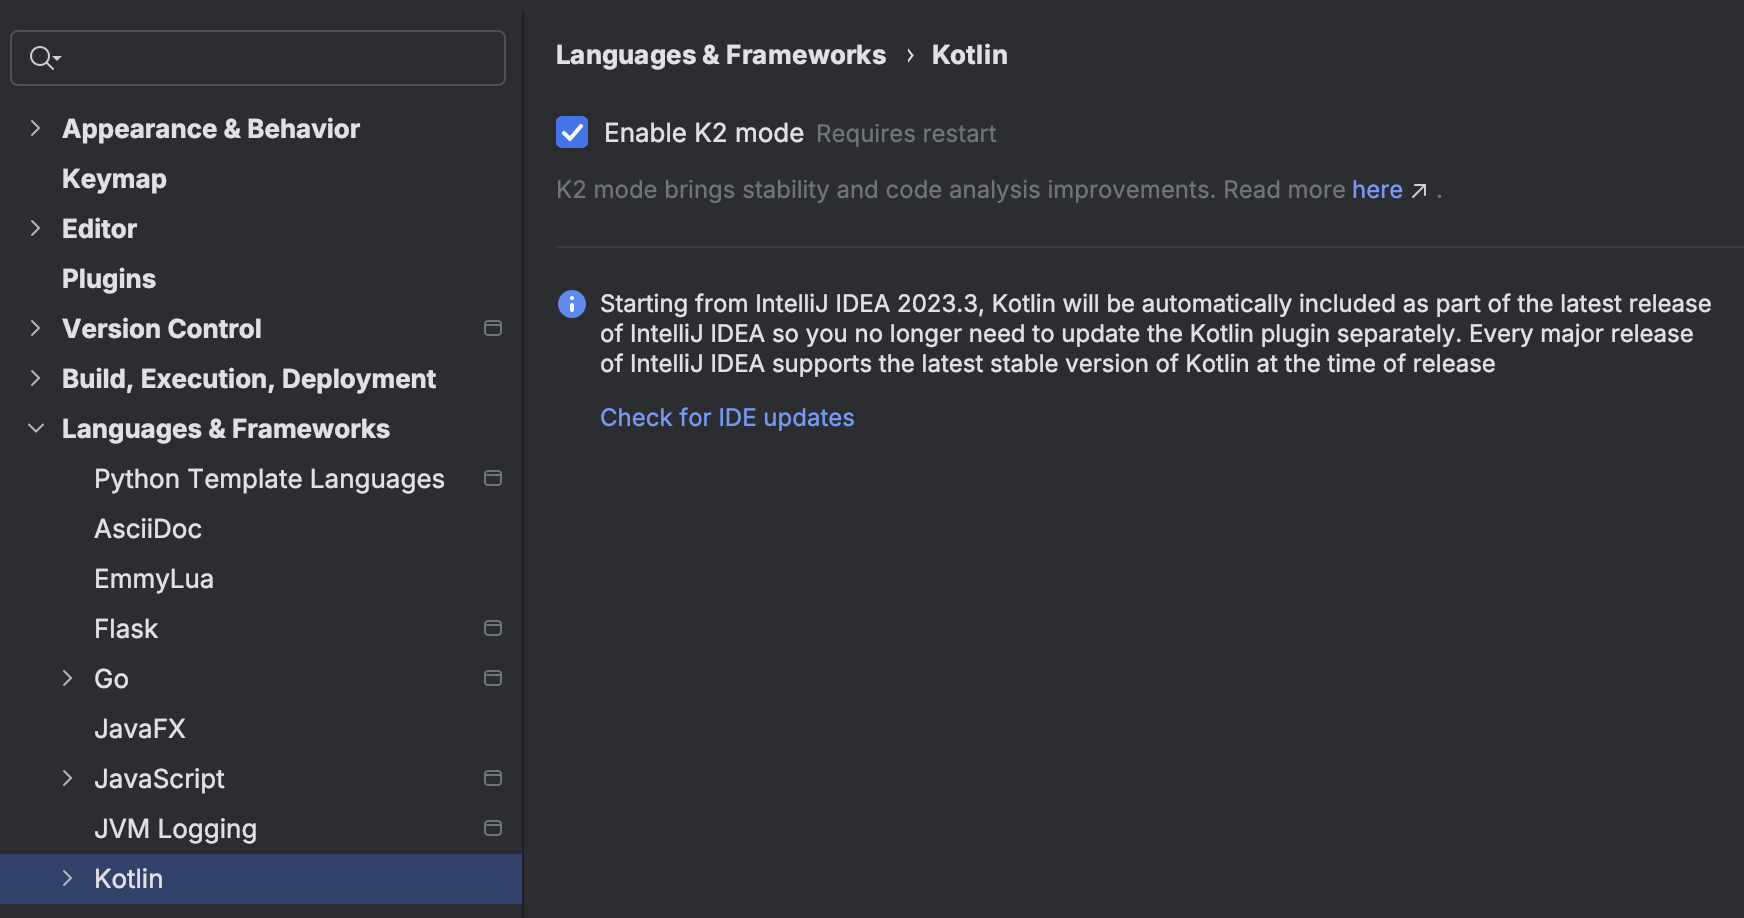
Make sure the K2 compiler is activated in the Intellij Kotlin settings:
Make sure the Kotlin compiler settings in Intellij are all updated to 2.1:
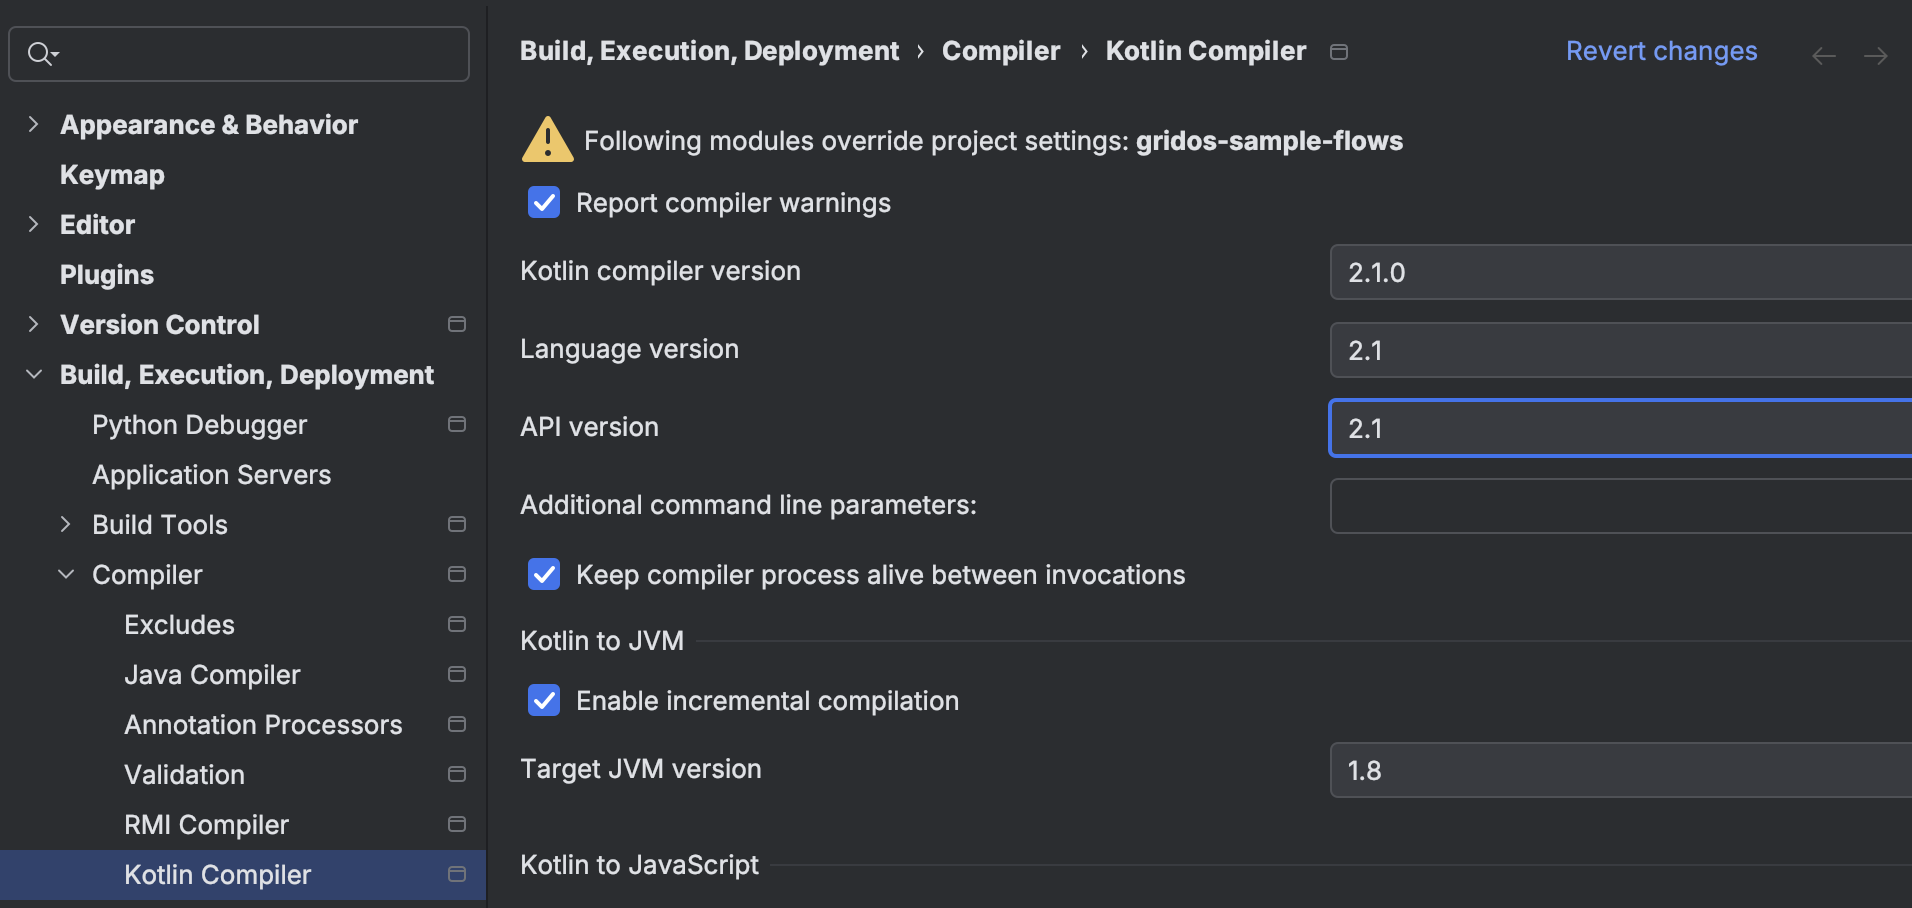
Make sure the Kotlin module settings in your project is either delegating to the project settings, or is set to level 2.1:

Now that you have a project set up, check out the flow tutorials for next steps.
Manual Setup
If you prefer to start with en empty IntelliJ project, do not forget to add the necessary dependencies to your pom.xml file including the Utilihive SDK.
You can check the pom.xml file of the example project for reference.
Downloading Sources
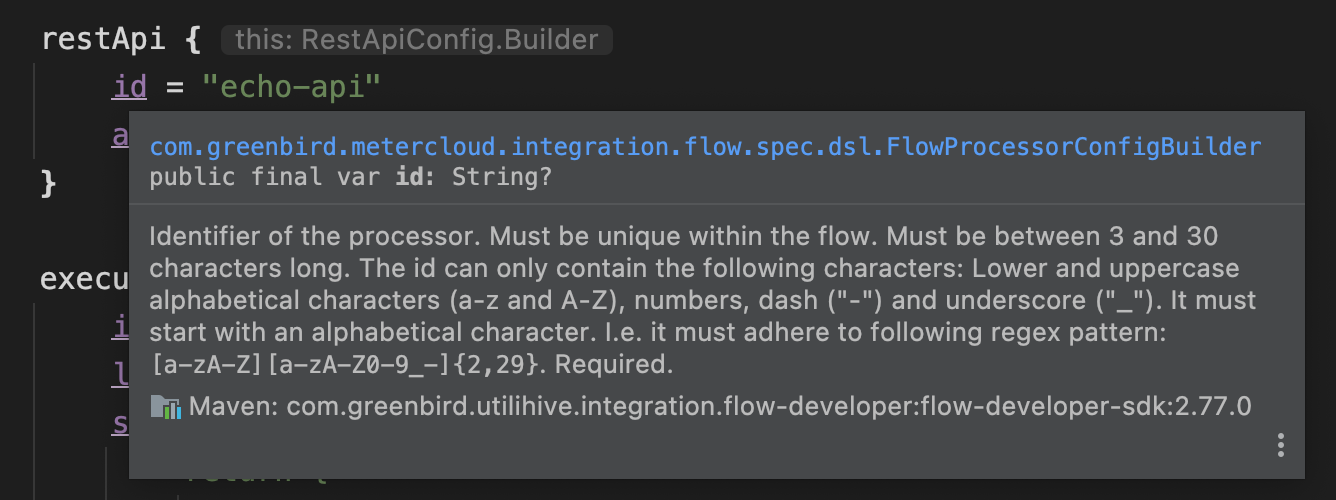
Whether you are using the example project or your own project, it’s recommended that you download the Maven sources for the SDK’s dependencies.
This gives you the ability to hover over processor properties and see immediate, contextual documentation directly in IntelliJ.
For example, the following image displays documentation for an id property:
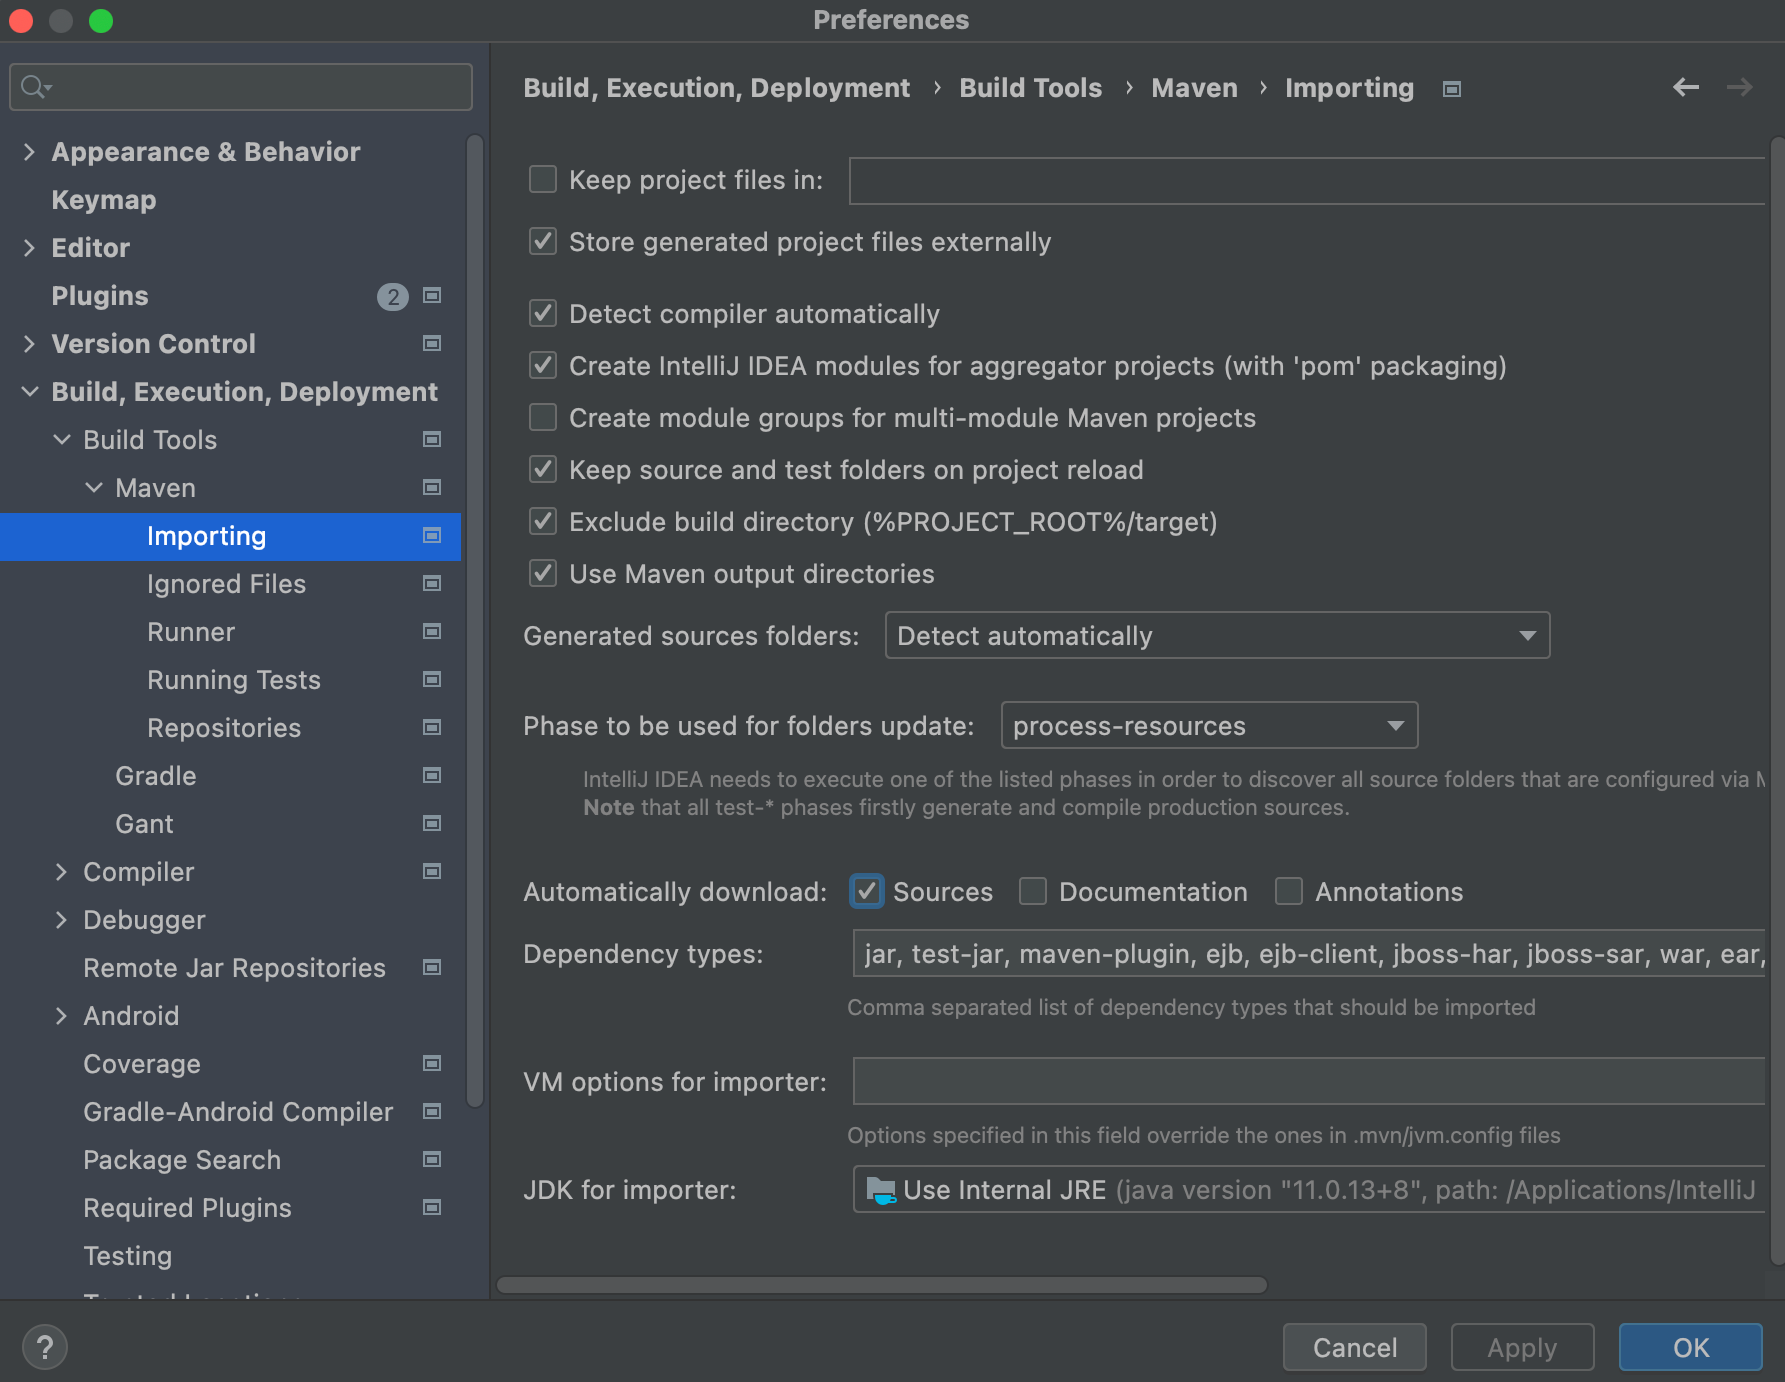
To enable this feature in IntelliJ, select File > Settings on Windows and Linux or IntelliJ IDEA > Settings on macOS. Select "Build, Execution, Deployment", then Build Tools, Maven, and finally Importing. In the "Automatically download" section, make sure the Sources option is checked. The screen should look like the following image:
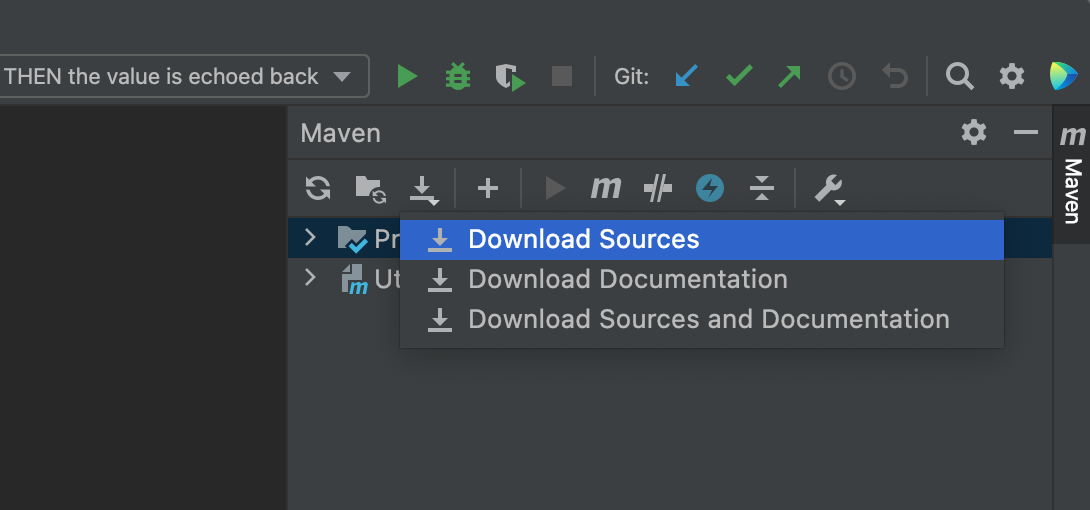
If you don’t want Maven sources to be automatically downloaded, or the auto-download doesn’t seem to be working, you can still manually trigger a source download. Expand the Maven tool window on the right, then select the download button and the Download Sources option. The following image demonstrates what you should see:
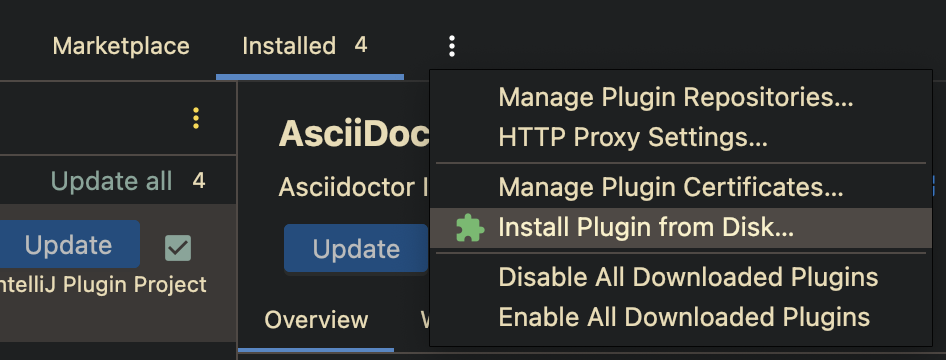
JSONiq Language Support IntelliJ Plugin
Utilihive data mapping is done with the JSONiq query language. We provide a plugin for IntelliJ IDEA which currently supports syntax highlighting for JSONiq files and inline JSONiq code. Support for code completion and code formatting are on the roadmap.
Access to the installation file is requested from the Utilihive Support. Once the zip has been downloaded, go to File > Settings > Plugins and select "Install Plugin from Disk", and select the zip. Then restart IntelliJ IDEA to apply the changes.
Usage
In JSONiq files (.jq or .jqy file extension), the syntax highlighting is enabled by default. Inline code can also be highlighted by using the language annotation provided by IntelliJ using the following syntax:
@Language("JSONiq")
val mapper = """
Your JSONiq code here
""".trimIndent()

// If the @Language annotation is not available, you can also use the following syntax:

//language=JSONiq
val mapper = """
Your JSONiq code here
""".trimIndent()
For more information on IntelliJ Language Injection.